
Planting
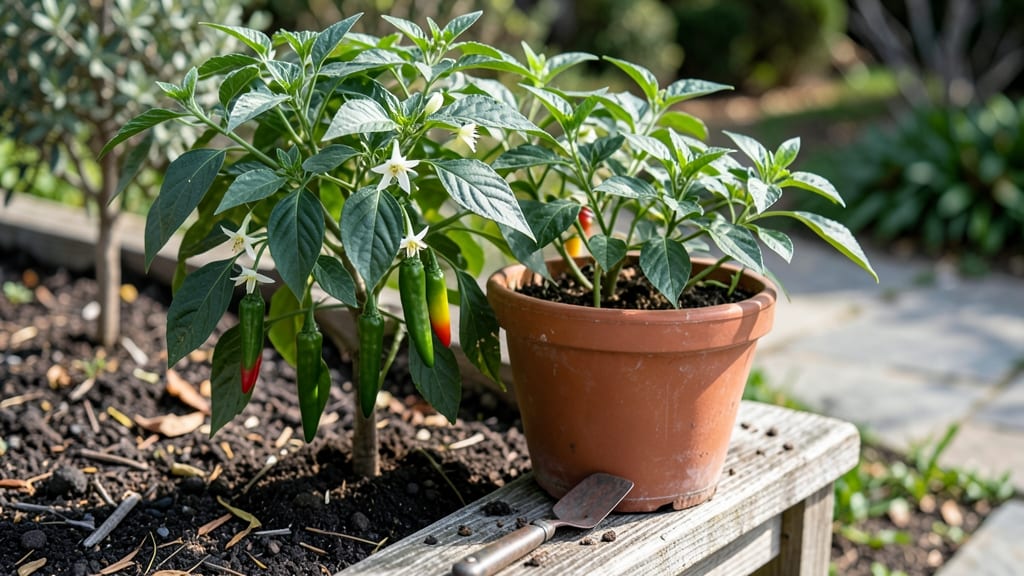
Planting Thai chili peppers isn’t just about growing heat—it’s about creating a vibrant, productive bush that delivers fiery flavor in just 60 days. 🌱 I’ve learned the hard way that these peppers thrive with the right balance of warmth, support, and patience, and skipping any step can turn your dream harvest into a leggy, fruitless disappointment.
The secret starts with warm soil (at least 70°F) and a sturdy 5-foot pole for support—Thai chilis grow tall and need something to cling to.
Whether you’re starting seeds indoors or transplanting young plants, the key is consistent moisture without drowning the roots, and full sun (at least 6-8 hours daily). I’ve seen seedlings stretch like overgrown weeds when they don’t get enough light, but with the right setup, you’ll avoid that pitfall entirely.
By day 60, you’ll be snipping bright red, finger-length peppers straight from the vine, ready to dry or use fresh. The plants stay productive all season if you keep them well-fed with compost and pruned lightly to encourage bushier growth.
The first harvest is the sweetest—imagine the spicy kick you’ll add to your favorite dishes! This method works for indoor growers (with grow lights) or outdoor gardeners in warm climates. Even if you’ve struggled with chilis before, these tips will turn your next batch into a heat-producing powerhouse.
Let’s get those seeds in the ground!
📚 In This Guide
- What you need
- Instructions
- Tips and common mistakes
- Wrapping up and next steps
What you need
- ● Thai chili seeds or seedlings: 1–2 packets of seeds (if starting from scratch) or 3–5 healthy seedlings (for faster results).
- ● Pro tip: Choose varieties like Prik Kee Noo (bird’s eye) or Prik Thai (long, slender) for classic Thai heat! 🌶️
- ● Containers or garden space: Containers: 5–7 inch pots (1–2 per seedling) with drainage holes.
- ● Garden beds: Full sun (6+ hours/day) and well-draining soil (pH 6.0–7.0).
- ● Potting mix: 1–2 bags of lightweight, sterile mix (e.g., 50% peat moss + 50% perlite or coconut coir).
- ● Fertilizer: Balanced 10-10-10 or 5-10-10 fertilizer for seedlings.
- ● High-phosphorus 3-4-6 fertilizer (for flowering/fruiting).
- ● Support system: Bamboo stakes (18–24 inches tall) or tomato cages (for pole-supported growth).
- ● Soft plant ties or twistable Velcro strips to secure vines.
- ● Watering can or hose: With a gentle spray nozzle (to avoid damaging seedlings).
- ● Pruning shears: Small, sharp scissors for trimming (sterilize with rubbing alcohol!). ✂️
- ● Mulch (straw or shredded leaves) to retain moisture and suppress weeds.
- ● Epsom salt (1 tbsp per gallon of water) for magnesium boosts during flowering.
- ● Neem oil or insecticidal soap to prevent pests (aphids, spider mites).
- ● Grow lights (if starting indoors before last frost).
- ● pH test kit (to monitor soil acidity).
Step-by-Step instructions for planting Thai chili peppers
Here’s how to grow fiery Thai chilis with strong, trellised stems—ready for harvest in just 60 days.
🌱 Step 1: Start Seeds Indoors for Early Growth
Thai chilis thrive with a head start. Plant seeds 8-10 weeks before your last frost in 2-3 inch deep biodegradable pots filled with sterile seed-starting mix. Press seeds ¼ inch deep—any deeper slows germination. Keep soil consistently moist at 75-85°F using a seedling heat mat. Expect sprouts in 7-14 days.
Once seedlings emerge, remove the heat mat but maintain 14-16 hours of light daily with a grow lamp. You’ll know they’re ready for transplant when they develop 2-3 true leaves and sturdy stems. Harden off seedlings by gradually exposing them to outdoor conditions over 7-10 days before planting.
🪴 Step 2: Prepare the Planting Site with Support
Choose a location with full sun (6+ hours daily) and well-draining soil. Thai chilis grow best in slightly acidic to neutral soil (pH 6.0-7.0). Amend heavy soil with compost to improve aeration. Install 4-5 foot tall bamboo stakes or trellis poles at planting time—chilis climb naturally, and support prevents broken stems as they fruit.
Dig holes 12-18 inches apart to allow airflow and reduce disease risk. Mix a handful of balanced fertilizer (10-10-10) into the bottom of each hole. Gently remove seedlings from their pots and place them in the holes, ensuring the trellis stake is centered behind each plant. Backfill with soil and press lightly to secure.
☀️ Step 3: Water and Fertilize for Vigorous Growth
Water deeply at planting to settle the soil, then maintain 1 inch of water per week, adjusting for rain. Let the top 1-2 inches of soil dry between waterings—overwatering causes root rot. Mulch with 2-3 inches of straw or shredded leaves to retain moisture and suppress weeds. Avoid wetting foliage to prevent fungal diseases like powdery mildew.
Fertilize every 3-4 weeks with a low-nitrogen, high-phosphorus formula (5-10-10) to encourage fruiting. You’ll notice new leaves emerging within 2-3 weeks of planting, and the first flowers (small white blooms) will appear in 4-6 weeks. Prune suckers—those small shoots forming in the leaf axils—to direct energy to fruit production.
✂️ Step 4: Train Vines and Harvest for Maximum Heat
As vines grow, gently weave them around the trellis stake, tying with soft twine every 12-18 inches to prevent snapping. Thai chilis produce fruit along the main stem and branches, so prune aggressively after harvest to encourage more blooms. Remove spent flowers and overripe peppers to redirect the plant’s energy to new growth.
Harvest peppers when they reach 2-3 inches long and develop their signature color (red, green, or yellow). Use pruning shears to cut stems just above a leaf node. You’ll harvest the first batch in 60-70 days, but continuous pruning and fertilizing can extend production into fall. Store harvested peppers in a cool, dry place or freeze them whole for later use.
⏰ Step 5: Overwintering and Long-Term Care
In colder climates, bring potted Thai chilis indoors before the first frost. Place them near a sunny window or under grow lights for 12-14 hours daily. Reduce watering but keep soil lightly moist. If grown in the ground, mulch heavily and cover with frost cloth on cold nights to protect plants until spring.
Save seeds from your best peppers by fermenting them in water for 3-5 days, then drying on paper towels. Label seeds and store in a cool, dark place for next year’s crop. Thai chilis are annuals, but with proper care, you can enjoy a steady supply of heat for years to come.
Tips & tricks for pole-supported Thai chili growth
Growing Thai chilis with trellises isn't just about aesthetics—it's the secret to maximizing heat production and plant health. Here's what I've learned from years of growing these fiery beauties.
Seedling Heat Management: Those 75-85°F soil temperatures in Step 1 are non-negotiable for germination. I use a seedling heat mat set to 80°F and keep it running until sprouts appear. The key is maintaining consistent warmth—fluctuations below 70°F will delay or prevent germination entirely. Once sprouts emerge, remove the heat mat but keep the soil warm by placing your pots on a heat source like a sunny windowsill or under a grow light.
Lighting Strategy: The 14-16 hours of light in Step 1 is crucial for preventing leggy seedlings. I use a full-spectrum LED grow light on a timer to ensure consistent light exposure. Position the light just a few inches above the seedlings—close enough to see gentle leaf movement when it's on, but not so close it burns them. For outdoor hardening, start with just 1-2 hours of direct sun per day and gradually increase over those 7-10 days to avoid shocking the plants.
Support System Installation: When installing your 4-5 foot tall bamboo stakes in Step 2, drive them 6-8 inches deep into the soil for maximum stability. I like to angle them slightly toward the prevailing wind direction to provide additional support. For container growing, use sturdy wire cages or trellis netting instead—just make sure they're wide enough to accommodate the plant's mature size. The goal is to prevent any stem stress that could reduce fruit production.
Pruning for Productivity: In Step 4, when pruning suckers and training vines, focus on maintaining just 2-3 main branches per plant. This directs all the plant's energy to fruit production rather than leaf growth. I prune suckers with clean scissors just above the leaf node where they emerge. For the main stem, remove any leaves that would shade the fruit—this helps the peppers ripen faster and develop more intense heat.
Pro Tips for Plant Thai Chili Peppers
- Growing Thai chilis with trellises isn't just about aesthetics—it's the secret to maximizing heat production and plan...
- Seedling Heat Management: Those 75-85°F soil temperatures in Step 1 are non-negotiable for germination. I use a seedl...
- Lighting Strategy: The 14-16 hours of light in Step 1 is crucial for preventing leggy seedlings. I use a full-spectru...
Frequently asked questions
Got questions about growing Thai chili peppers? You’re not alone! Here are answers to the most common concerns—from timing to troubleshooting—so you can grow fiery, flavorful peppers with confidence.
When is the best time to plant Thai chili peppers?
Plant Thai chili seeds indoors 8–10 weeks before your last frost date (or directly outdoors after soil temps hit 70°F+). They thrive in warm weather, so avoid planting too early—cold soil stunts growth. If you’re in a short-season zone, opt for fast-maturing varieties (like Thai Hot or Bird’s Eye) for a quicker harvest!
How long do Thai chili peppers take to grow and produce?
With proper care, Thai chili peppers can mature in 60–90 days from transplanting. Early varieties (like Thai Hot) may fruit in as little as 50–60 days, while heirloom types take longer. Pole support speeds up growth by improving air circulation and reducing disease. Patience pays off—your first peppers will be worth the wait!
Can I grow Thai chili peppers in containers?
Thai chili peppers thrive in containers as long as the pot is at least 12–18 inches deep with drainage holes. Use a lightweight potting mix (avoid garden soil) and place them in a sunny spot (6+ hours of light daily). Dwarf varieties (like Thai Sweet) are ideal for small spaces—just ensure the container stays warm.
Why aren’t my Thai chili plants producing peppers?
No peppers? Check these fixes:
- Not enough light: Move plants to a sunnier spot or supplement with grow lights (12–16 hours/day).
- Overcrowding: Thin seedlings to 12–18 inches apart (or prune leggy growth).
- Nutrient deficiency: Feed with a balanced fertilizer (10-10-10) when flowers appear.
- Temperature stress: Thai chilies need warmth (70°F+) to set fruit—avoid cold drafts.
What can I do with Thai chili peppers if my harvest is too spicy?
Too much heat? No problem! Use these tricks:
- Remove seeds (where most capsaicin lives) before cooking.
- Soak in milk (10 mins) to neutralize spice—great for sauces!
- Pair with sweets (like mango or pineapple) to balance heat.
- Freeze or dry peppers for later use—heat intensifies when dried!
Wrapping up and next steps
Growing your own Thai chili peppers is a rewarding journey that delivers bold flavor and fiery satisfaction in just 60 days!
With the right soil, sunlight, and care, you’ll soon be harvesting peppers to spice up your favorite dishes. Don’t stop here—experiment with different varieties, share your harvest with friends, or even try preserving them for later. Your green thumb is about to get a delicious workout! 🌱🔥
Next step: Grab those seeds and get planting—your kitchen (and taste buds) will thank you!