
Picking
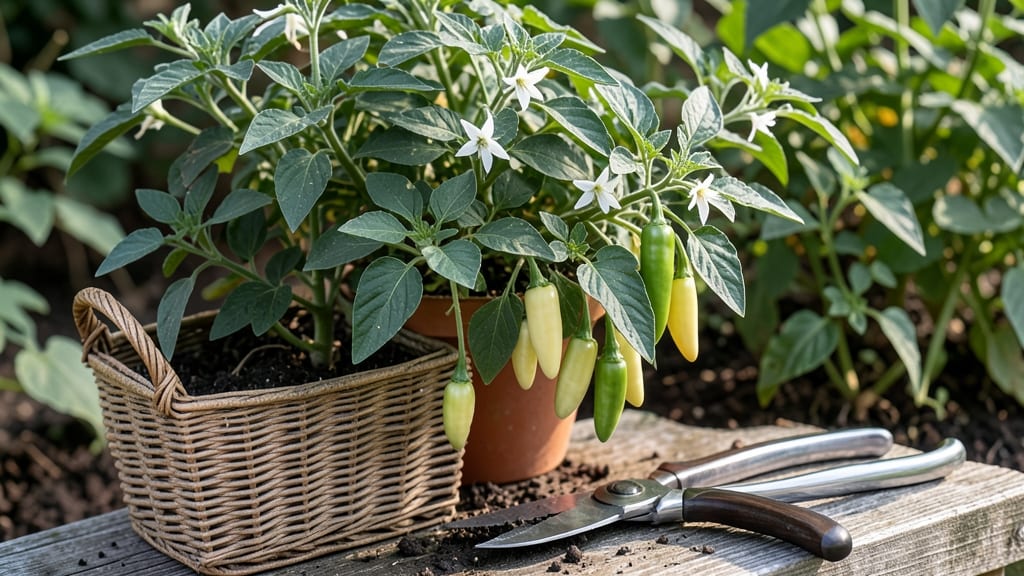
Pepperoncini peppers are ready to pick when they reach 2–3 inches and turn a deep, glossy green 🌶️—a moment that separates tangy perfection from bitter disappointment.
Picture this: You’ve nurtured your plants all season, and now the difference between a crunchy, zesty pepperoncini and a mealy, overripe one comes down to timing. Miss the window, and you’ll end up with peppers that lack the signature snap or heat you crave.
Most varieties hit peak flavor around 60–75 days after transplanting, but visual cues—like firm skin and a snappy stem—are the real giveaways. Below, I’ll walk you through exactly what to look for, plus how to harvest without damaging your plant.
Whether you’re a first-time grower or a seasoned gardener, these tips will ensure your pepperoncini harvest is perfect every time—no guesswork required.
3 Visual cues to identify perfectly ripe pepperoncini peppers
Picking pepperoncini peppers at the perfect moment transforms your garden harvest into flavor-packed crunchy gems. Unlike bell peppers, these little powerhouses need precise timing—too early and they’re bland, too late and they lose their signature tang.
The key lies in three visual cues that reveal when your peppers are ready to pluck.
First-time growers often struggle because pepperoncini don’t turn red like their bell pepper cousins. Instead, they mature to a pale green or yellowish hue while maintaining their firm, glossy texture.
Missing these signs means you might end up with peppers that are either underdeveloped or overly soft. Let’s break down exactly what to look for.
- 1. Size: 2-3 inches long with a thick, rounded shape (about the size of a grape tomato)
- 2. Color: Pale green to yellowish with no dark spots (never bright green like unripe bell peppers)
- 3. Texture: Firm and glossy skin that snaps when twisted (not mushy or wrinkled)
Many gardeners make the mistake of waiting for pepperoncini peppers to turn red, but these varieties stay green or yellow. Overripe peppers develop a dull, wrinkled skin and lose their crisp texture, making them perfect for sauces but terrible for fresh snacking.
I’ve seen gardeners harvest at 60 days (too early) or wait until 90 days (too late)—both ruin the flavor.
The ideal harvest window for pepperoncini falls between 70-75 days after transplanting, when all three cues align. At this stage, the peppers pack their signature tangy heat without bitterness. Check your plants every 2-3 days during peak season (July-September) to catch them at perfection.
Another common error is picking peppers that are still attached to the plant with a thick stem. Always harvest by twisting gently or using clean pruning shears just above the stem.
This prevents damage to the plant and encourages more peppers to develop. I’ve found that harvesting in the morning (when peppers are cool) preserves their crispness longer.
For container growers, pepperoncini peppers mature slightly faster due to warmer root zones. Watch for the color shift from bright to pale green—this is your biggest clue.
In cooler climates (USDA zones 5-6), peppers may take 5-7 extra days to reach maturity, so start checking 10 days earlier than the 75-day guideline.
Once harvested, store pepperoncini in the fridge for up to 2 weeks or ferment them immediately for that classic antipasto crunch. The key to great pepperoncini lies in the garden—knowing these three visual cues ensures you’ll always pick them at peak flavor. Now go check your plants—they’re probably ready!
🌱
Pepperoncini pepper growth stages: from flower to harvest
Growing pepperoncini peppers from flower to harvest is a rewarding process, but timing is everything. These peppers develop through 4 key stages, each requiring specific care to ensure peak flavor. The 2-3 week window between green and mature stages is where their signature tangy heat develops.
First, white flowers appear 50-60 days after transplanting. These delicate blooms signal the start of fruit formation. Only 10-20% of flowers will produce peppers, so don't be discouraged if not every bloom sets fruit. Pollination is crucial—hand-pollinate if needed in humid climates.
Stage 2 begins when tiny green peppers form. At this point, they're 1-1.5 inches long and still developing their structure. This is when flavor compounds start building, but they're not yet ready to pick. The critical 2-3 week window begins here, where proper care determines final quality.
| Stage | Visual Cues | Days After Transplant | Action |
|---|---|---|---|
| Flowering | White blooms appear | 50-60 | Hand-pollinate if needed |
| Green Fruit | 1-1.5" peppers | 60-70 | Monitor for pests |
| Mature Green | 2-3" firm peppers | 70-75 | Check daily for harvest |
| Peak Flavor | Glossy, deep green | 75-80 | Harvest immediately |
During Stage 3, peppers grow to 2-3 inches long and develop a glossy finish. This is the peak flavor window where their unique tanginess intensifies. The skin becomes firm and slightly waxy—this texture is your best indicator. If you pick too early, they'll lack that signature crunch and heat.
In Stage 4, peppers reach their final size but may start showing signs of overripeness if left too long. Look for uneven color or wrinkled skin—these are red flags.
The 2-3 week window between green and mature stages is where their flavor compounds fully develop, so don't rush harvesting just because they're big enough.
My best tip? Harvest in the morning after dew dries when peppers are cool and firm. Use clean scissors to snip stems—this prevents plant damage and encourages more fruit production. Store harvested peppers in paper bags in the fridge for up to 2 weeks to preserve that just-picked flavor.