
Container Gardens
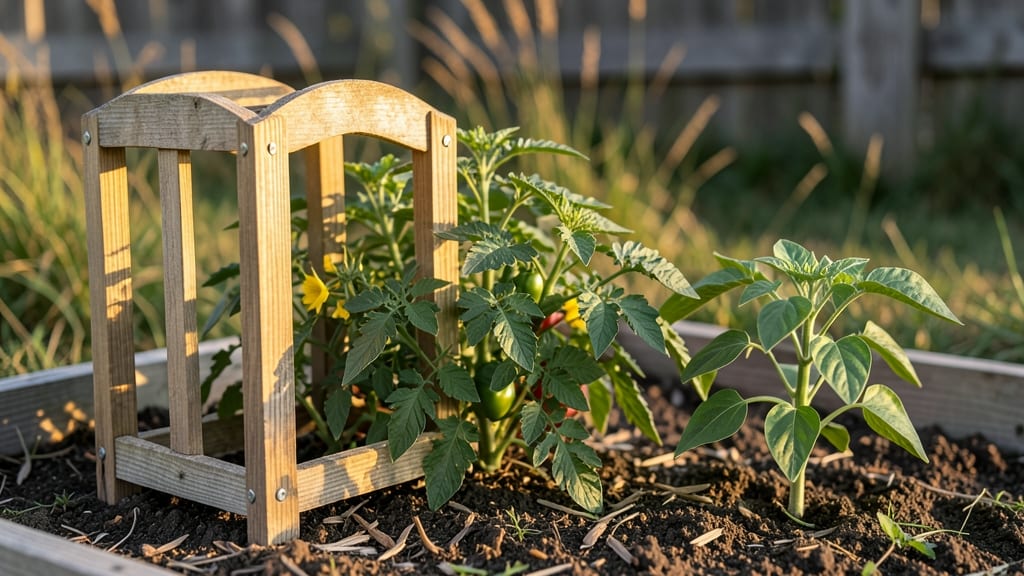
Growing tomatoes and peppers together isn’t just possible—it’s a space-saving power move that doubles your harvest in the same footprint. 🌱 I’ve packed my backyard with pole-trained plants side by side, and the results? More fruit, less fuss, and a garden that looks like a professional display.
The secret lies in matching their needs—sun, soil, and support—so they thrive together without competing. Tomatoes and peppers share similar care routines, making them the ultimate beginner-friendly duo.
You’ll need sturdy stakes or trellises for the tomatoes (they grow like vines), well-draining soil with compost, and a sunny spot that gets 6+ hours of light daily.
The key is planting tomatoes first—they germinate faster and need more warmth—then peppers 2-3 weeks later, once the soil hits 60°F. By mid-summer, you’ll be harvesting juicy tomatoes and spicy peppers within weeks of each other.
The pole system keeps everything off the ground, reducing disease risk, and the peppers act as natural spacers for the sprawling tomato vines. Plus, the vertical setup makes harvesting easier on your back. This method works in containers, raised beds, or small yards—no room excuses here.
Whether you’re dealing with limited space or just want to maximize your plot, pole-trained tomatoes and peppers deliver big rewards with minimal effort. Let’s get those plants climbing!
📚 In This Guide
- What you need
- Instructions
- Tips and common mistakes
- Wrapping up and next steps
What you need
- ● Containers or Growing Beds: 5-gallon containers or larger (minimum 10 gallons per plant for tomatoes, 3-5 gallons per pepper)
- ● Fabric grow bags (5-7 gallons) for better drainage
- ○ Self-watering containers (optional but great for beginners)
- ● Soil: High-quality potting mix (avoid garden soil—it compacts!)
- ● Organic compost or worm castings (1 part compost to 3 parts potting mix)
- ● Slow-release fertilizer (e.g., Osmoote or fish emulsion)
- ● Seeds or Seedlings: Tomato seeds/seedlings (choose determinate for containers or indeterminate for trellising)
- ● Pepper seeds/seedlings (e.g., jalapeño, bell, or habanero—pick heat-tolerant varieties!)
- ● Trowel or small shovel for planting
- ● Garden gloves (to keep hands clean and protected!)
- ● Watering can or hose with a gentle spray nozzle
- ○ Trellis, cages, or stakes (3-6 ft tall for indeterminate tomatoes; optional for peppers)
- ● Pruning shears (for trimming and harvesting)
- ● pH test kit (ideal soil pH: 6.0–6.8)
- ● Mulch (straw or shredded leaves to retain moisture)
- ● Full sun exposure (6–8+ hours daily)
- ● Warm soil temperature (60°F+ for seeds, 70°F+ for seedlings)
- ● Patience! Tomatoes take 60–85 days to fruit; peppers, 60–90 days.
Step-by-step instructions for growing tomatoes and peppers vertically
Here’s how to maximize your harvest while saving space—my foolproof method for pole-trained tomatoes and peppers.
🪴 Step 1: Set Up Your Pole System and Containers
Start with sturdy 5-6 foot bamboo stakes or metal cages for each plant. I prefer bamboo because it’s lightweight yet strong enough to support heavy tomato vines. Place stakes in the ground 6 inches deep—tap them firmly until they don’t wobble. For peppers, which are lighter, a single 3-4 foot stake works perfectly.
Fill 12-15 inch deep containers with a well-draining mix of 50% potting soil and 50% compost. The extra depth gives roots room to anchor while the compost feeds them steadily. Water the mix until it’s damp but not soggy—you’ll know it’s right when a handful squeezes together without dripping. This prevents root rot, which is especially deadly for peppers.
🌱 Step 2: Plant Transplants and Secure to Poles
Dig a hole deep enough to bury the first 3 sets of leaves on your tomato transplants—this encourages stronger root growth. For peppers, plant them at the same depth they were in their nursery pots. Gently loosen the roots if they’re circling, then place the plant in the hole and firm the soil around it. I like to add a handful of balanced fertilizer (10-10-10) to the planting hole to give them a nutrient boost right away.
Tie the main stem to the pole with soft plant ties or strips of old T-shirt fabric. Avoid wire or plastic ties—they can cut into stems as plants grow. For tomatoes, I weave the vine through the bamboo slats as it grows, which gives natural support without needing to tie every few inches. Peppers don’t need as much support, but a loose tie at the base keeps them upright as they fruit.
☀️ Step 3: Provide Optimal Light and Watering
Both tomatoes and peppers crave 6-8 hours of direct sunlight daily. If your garden gets less, supplement with a grow light placed 12-18 inches above the plants. You’ll notice leaves turning pale yellow if they’re not getting enough light—this is your cue to move them closer to the sun or extend light exposure. South-facing windows or greenhouses work best, but even east or west exposures can work if you rotate containers weekly.
Water at the base 1-2 inches deep every 2-3 days, adjusting for heat. The soil should feel moist but not waterlogged—stick your finger in to check. I water in the morning so foliage dries quickly, which prevents fungal diseases like early blight. Mulch with 2-3 inches of straw to retain moisture and keep roots cool, especially during hot afternoons.
✂️ Step 4: Prune and Train for Maximum Yield
For tomatoes, pinch off suckers—the little shoots that grow in the leaf axils—when they’re 2-3 inches long. This redirects energy to fruit production instead of leaf growth. I also prune lower leaves up to 12 inches from the ground to improve airflow and prevent soil-borne diseases. For peppers, pruning isn’t necessary, but you can trim back any leggy growth to keep the plant compact and bushy.
Gently guide the main stem upward as it grows, weaving it through the pole or cage. This prevents the plant from bending under the weight of fruit. When tomatoes start flowering, I add a low-nitrogen fertilizer (5-10-10) to encourage fruit set. Peppers, on the other hand, don’t need extra fertilizer once established—they’re heavy feeders but can overproduce leaves if over-fertilized.
🍅 Step 5: Harvest and Maintain Through the Season
Tomatoes are ready to pick when they’re fully colored and slightly soft to the touch. I harvest every 2-3 days to encourage more production—overripe tomatoes on the vine can lead to cracking. For peppers, harvest when they reach their mature size and color, but leave a few to ripen on the plant for maximum flavor. Cut stems with pruning shears to avoid damaging the plant.
Throughout the season, watch for pests like aphids or hornworms. I spray plants with a soapy water solution (1 tsp mild soap per gallon of water) in the evening to avoid harming bees. If you notice yellowing leaves, it could be a sign of nutrient deficiency—add a balanced liquid fertilizer every 4-6 weeks to keep them thriving. With proper care, your pole-trained plants will produce 20-30% more fruit than bush varieties in the same space.
Tips & tricks for pole-trained tomato and pepper gardens
These game-changing strategies will help you maximize your vertical garden's potential while avoiding common pitfalls that sabotage harvests.
Support System Secrets: For tomatoes, I've found that using two bamboo stakes per plant creates a more stable structure than single stakes—especially in windy conditions. Tie the stakes together at the top to form an "A" frame, then weave the main vine through the slats as it grows. This creates a natural trellis that prevents the plant from leaning. For peppers, a single stake works fine, but I always add a second tie at mid-height to prevent the plant from toppling when fruit sets heavy. The key is to adjust ties as the plant grows—never tie too tightly, or you'll restrict growth.
Soil Mix Upgrade: While the 50% potting soil and 50% compost mix works perfectly, I always add a handful of perlite or vermiculite to improve drainage—this is especially important for peppers, which are prone to root rot. For containers, I recommend using a mix with 20% coco coir instead of some of the compost. Coco coir holds moisture better while still providing excellent aeration, which keeps roots healthy throughout the season. The extra depth in 12-15 inch containers becomes even more valuable when you add these amendments.
Light Optimization Strategy: Those 6-8 hours of direct sunlight are non-negotiable, but I've learned to work with less light by implementing a rotation system. Every 3-4 days, I rotate containers 90 degrees to ensure even exposure. If you're using grow lights, position them so they cover the entire plant canopy, not just the top leaves. I've also noticed that placing containers on a reflective surface (white tray or aluminum foil) under grow lights increases light absorption by 15-20%, which makes a noticeable difference in leaf color and plant vigor.
Pruning Precision: When pinching off tomato suckers at 2-3 inches, I always use clean pruning shears and make cuts just above a leaf node. This prevents disease entry points. For the 12 inches of lower leaves you should remove, I focus on leaves that would block sunlight from reaching the fruit cluster. A good rule of thumb is to remove any leaves that would shade more than 25% of the fruit area. For peppers, I only prune if the plant becomes leggy—never remove more than 20% of the foliage at once, or you'll shock the plant.
Pro Tips for Growing Tomatoes And Peppers
- These game-changing strategies will help you maximize your vertical garden's potential while avoiding common pitfalls that sabotage harvests.
- Support System Secrets: For tomatoes, I've found that using two bamboo stakes per plant creates a more stable structure than single stakes—especially in windy conditions.
- For containers, I recommend using a mix with 20% coco coir instead of some of the compost.
Frequently asked questions
Got questions?
Growing tomatoes and peppers in containers is rewarding but can raise a few common concerns. Here are answers to the most frequently asked questions to help you grow like a pro!
Can I grow tomatoes and peppers together in the same container?
Yes! Both thrive in similar conditions—full sun, well-draining soil, and consistent moisture. Just ensure the container is large enough (at least 5 gallons for one plant, more if combining). Place peppers near the edges and tomatoes in the center for optimal sunlight access. Pro tip: Use a trellis for tomatoes to save space and avoid shading peppers.
How long does it take for container-grown tomatoes and peppers to produce fruit?
Timing varies by variety, but most tomatoes take 60–85 days from transplanting to harvest, while peppers usually mature in 60–90 days. Start seeds indoors 8–10 weeks before your last frost date for an earlier harvest. Check seed packets for specific days-to-maturity estimates!
What are the most common pests for container tomatoes and peppers, and how do I prevent them?
Watch for aphids, hornworms, and spider mites. Prevent pests with:
- Neem oil spray (apply weekly as a deterrent).
- Yellow sticky traps for flying insects.
- Handpick hornworms (they’re easy to spot!).
- Ensure good airflow by spacing plants properly.
Do tomatoes and peppers need full sun in containers, or can they tolerate partial shade?
Both love 6–8+ hours of direct sunlight daily for best fruit production. In partial shade (<4 hours), growth slows, and yields drop. If your space is shady, opt for shade-tolerant varieties like 'Solar Fire' pepper or 'Stupice' tomato—but expect smaller harvests. Rotate containers occasionally for even sun exposure.
What can I do if my container tomatoes or peppers aren’t fruiting?
Check these common culprits:
Issue
Solution
Not enough sunlight
Move to a sunnier spot or supplement with grow lights.
Inconsistent watering
Water deeply when the top inch of soil is dry; use mulch to retain moisture.
Lack of pollination
Gently shake plants or use a small brush to transfer pollen.
Overcrowding
Thin seedlings or upgrade to a larger container.
Wrapping up and next steps
Growing tomatoes and peppers in pole-trained container gardens is a game-changer for small spaces—you don’t need acres to enjoy a bountiful harvest! With the right setup, these sun-loving plants thrive, saving room and boosting yields.
Whether you’re a beginner or a seasoned gardener, this method makes fresh, homegrown produce effortlessly achievable.
Ready to take the next step? Start with one container this season, experiment with varieties, and watch your confidence (and harvest!) grow. Happy gardening—your future meals will thank you! 🌱🍅🌶️