
Planting
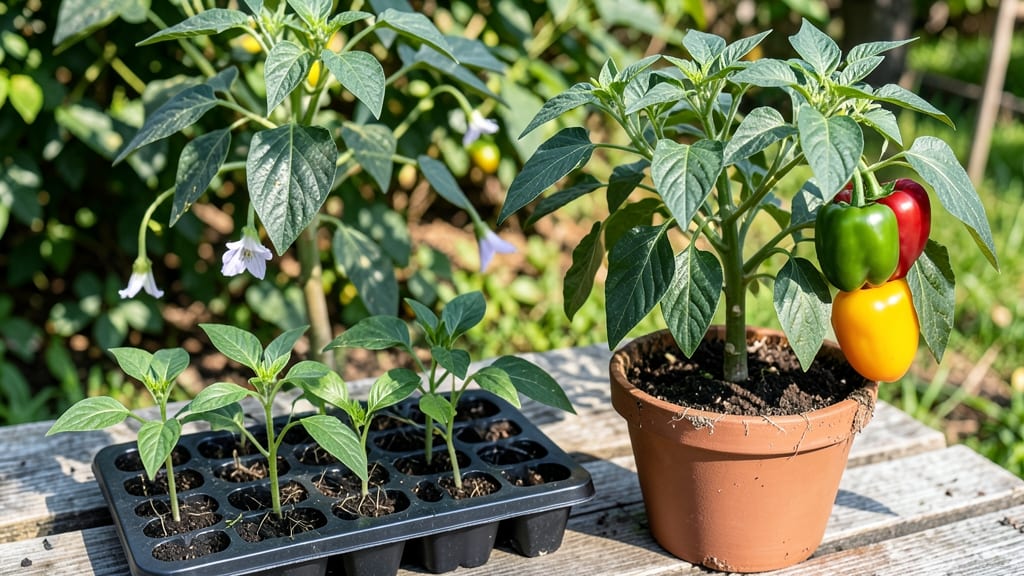
Planting bell peppers outside means sweet, crisp harvests by summer—but timing and technique make all the difference. ✨ I learned the hard way that rushing seedlings into cold soil leads to stunted growth, so I now wait until nighttime temperatures stay above 55°F before transplanting.
The key is giving them a head start indoors (if your climate has cool springs) or choosing heat-tolerant varieties like 'California Wonder' or 'Jupiter' for direct sowing. Start with well-draining soil amended with compost—bell peppers hate soggy roots.
A 5-10 foot tall trellis or sturdy stakes saves space and keeps fruits off the ground, reducing rot and pests. Space plants 18-24 inches apart in rows 24-36 inches apart to allow airflow, which cuts down on fungal diseases like blight.
Mulch with straw or grass clippings to retain moisture and keep soil temps steady. After planting, water deeply once a week (more in extreme heat) and avoid wetting leaves to prevent disease. A light fertilizer with balanced NPK (10-10-10) every 4-6 weeks keeps them productive.
Watch for hornworms—they’ll strip plants overnight—and handpick them early. With pole training, you’ll fit 3-4 times more plants in the same space, and the vertical harvest makes weeding and maintenance easier. This method works in zones 4-10, though southern gardeners can plant earlier.
The first peppers appear in 60-70 days, and with proper care, one plant yields 10-15 pounds of fruit. The real payoff? Homegrown peppers taste nothing like store-bought—sweeter, crunchier, and packed with flavor. Let’s get those seeds in the ground!
📚 In This Guide
- What you need
- Instructions
- Tips and common mistakes
- Wrapping up and next steps
What you need
- ● Bell pepper seeds or seedlings: Choose disease-resistant varieties like 'California Wonder,' 'Jupiter,' or 'Sweet Banana.' Start with 3-5 plants for a small garden or 6-10 plants for a family-sized harvest.
- ● Pole trellis or stakes: Opt for 5-6 ft tall bamboo stakes, wooden posts, or a T-post trellis kit (1-2 stakes per plant or a shared trellis for 3-4 plants).
- ● Garden twine or plant ties: Soft, biodegradable twine (e.g., 1/4-inch diameter) or reusable fabric ties (10-20 ft total).
- ● Well-draining potting mix or garden soil: A 50/50 blend of compost and store-bought potting mix (or raised bed soil amended with compost). Avoid heavy clay soil.
- ● Compost or organic fertilizer: Balanced 10-10-10 or tomato/vegetable-specific fertilizer (follow package rates).
- ● Mulch: 2-3 inches of straw, wood chips, or shredded leaves to retain moisture and suppress weeds.
- ● Watering can or hose with a gentle spray nozzle: Bell peppers need 1-1.5 inches of water per week—consistency is key!
- ● Hand trowel or transplanting spade: For digging holes and moving seedlings.
- ● Pruning shears: To trim suckers and shape plants as they grow.
- ● Garden gloves: Protect your hands from thorns (some varieties have them!) and dirt.
- ● pH testing kit: Ensure soil pH is 6.0-6.8 (bell peppers are picky!).
- ○ Row cover or frost cloth: Optional but helpful for early-season protection (especially in cooler climates).
- ● Sunlight: Full sun (6-8+ hours daily)—no shade allowed!
- ● Warmth: Wait until after the last frost and soil temps are at least 60°F (15°C).
- ● Space: 18-24 inches apart in rows 2-3 ft apart (or pole-trained vertically to save space!).
- ● Drainage: Avoid soggy soil—bell peppers hate "wet feet."
Step-by-step instructions for planting pole-trained bell peppers
Here’s the method I’ve used to grow healthy, high-yielding bell peppers in small spaces—no sprawling plants, just vertical productivity.
🌱 Step 1: Prepare the Planting Site for Warm Soil
Bell peppers thrive in warm soil, so wait until after the last frost when soil temperatures reach 60°F or higher. I test mine with a soil thermometer—peppers won’t germinate well in cooler soil. Choose a spot with full sun exposure (6+ hours daily) and well-draining soil. If your garden soil is heavy clay, amend it with 2-3 inches of compost mixed into the top 6 inches to improve drainage and fertility.
Loosen the soil to a depth of 12 inches using a garden fork or tiller. This prevents root-bound stress later. Space your planting holes 18-24 inches apart in rows 24-36 inches apart—this gives roots room to spread without crowding. If planting in raised beds, ensure they’re at least 8 inches deep to accommodate pepper roots.
🪴 Step 2: Install Trellis or Pole Structure
Before planting, set up your pole-training system. I use 5-6 foot tall bamboo stakes or sturdy wooden posts, placing one at each corner of the planting area. Tie 3-4 horizontal strings or wires between the stakes at heights of 12, 24, 36, and 48 inches. This creates a ladder-like structure for the peppers to climb. Alternatively, use a single 6-foot tall tomato cage per plant if you prefer individual support.
For a more compact setup, I sometimes use cattle panels bent into a teepee shape and anchored with stakes. This works well for 4-6 plants in a small garden. The key is ensuring the structure is stable—peppers can get heavy with fruit! Water the poles lightly before planting to settle them into the soil.
🌿 Step 3: Plant Transplants and Train Initial Growth
Plant your bell pepper transplants 1-2 weeks after the last frost, when soil is warm and seedlings are 6-8 inches tall with 4-5 true leaves. Dig a hole slightly larger than the root ball and place the plant so the top of the roots sits 1 inch below soil level. This encourages strong root growth without burying the stem too deeply.
Gently firm the soil around the base and water deeply to settle everything. As soon as the plant reaches 8-10 inches tall, tie the main stem to the lowest string or wire using soft plant ties or strips of old fabric. This prevents the plant from flopping over as it grows. Watch for side shoots forming at the stem junctions—these will become your primary branches. Remove all but the top 2-3 strongest shoots to focus energy on upward growth.
✂️ Step 4: Prune and Guide Growth Vertically
Throughout the growing season, prune aggressively to maintain a single main stem with 3-4 main branches. Remove any suckers (side shoots) that form below the first flower cluster—these divert energy from fruit production. When branches reach the top of your trellis, pinch off the growing tips to encourage bushier growth at that level. This creates more fruiting sites without overcrowding.
Gently weave new growth through the horizontal strings as it emerges. I like to use soft plant clips instead of ties to avoid damaging stems. If a branch grows too long between strings, tie it loosely to the nearest support. This keeps the plant compact and makes harvesting easier. Watch for yellowing leaves—these often signal overwatering or nutrient deficiency, so adjust care accordingly.
💧 Step 5: Water and Fertilize for Continuous Production
Water pole-trained peppers deeply 1-2 times per week, aiming for 1-1.5 inches of water per week. Use drip irrigation or soaker hoses to keep foliage dry and prevent disease. I water in the morning to allow leaves to dry before evening. Mulch around the base with 2-3 inches of straw or shredded leaves to retain moisture and suppress weeds.
Fertilize every 3-4 weeks with a balanced 10-10-10 or 5-5-5 fertilizer, following package instructions. Peppers are heavy feeders, so I switch to a low-nitrogen, high-phosphorus formula (5-10-10) once flowers appear to encourage fruiting. Stop fertilizing 4-6 weeks before the first frost to allow peppers to mature fully on the vine.
Tips & tricks for pole-trained bell pepper success
These are the hard-won lessons that'll transform your compact garden into a pepper powerhouse—no sprawling messes, just vertical productivity.
Soil Temperature is Non-Negotiable: That 60°F minimum isn't just a suggestion—bell peppers are tropical plants at heart. I've seen seedlings rot in cooler soil despite perfect planting. Use a soil thermometer for 3 days before planting to confirm stability. If your mornings dip below 60°F, consider black plastic mulch to warm the soil faster. The roots will thank you with vigorous growth from day one.
Trellis Stability is Critical: I learned this the hard way when a summer storm snapped my bamboo stakes. Your pole structure needs to handle 1-2 pounds per pepper at maturity. For extra security, bury stakes 12 inches deep or use concrete anchors for heavy structures. The last thing you want is a collapsed trellis mid-season when your peppers are heavy with fruit. I now reinforce corners with 2x4 lumber brackets for added stability.
Pruning Strategy Makes All the Difference: In Step 4, when you're maintaining 3-4 main branches, focus on removing suckers below the first flower cluster. These energy vampires can reduce your yield by 30% if left unchecked. I use clean pruning shears to make cuts just above a leaf node—this encourages faster healing. For compact varieties, I sometimes limit to just 2 main branches to maximize fruit size, though this reduces total yield.
Watering Wisdom for Vertical Growth: The 1-1.5 inches per week guideline assumes consistent rainfall or irrigation. In my experience, pole-trained peppers actually need slightly more frequent watering because their roots are concentrated near the base. I water every 2-3 days during hot spells, always in the morning, and monitor for wilting leaves. The key is keeping the soil consistently moist—not soggy—so the plants can focus energy on fruit production rather than stress responses.
Pro Tips for Plant Bell Peppers Outside
- These are the hard-won lessons that'll transform your compact garden into a pepper powerhouse—no sprawling messes, just vertical productivity.
- Soil Temperature is Non-Negotiable: That 60°F minimum isn't just a suggestion—bell peppers are tropical plants at heart.
- Trellis Stability is Critical: I learned this the hard way when a summer storm snapped my bamboo stakes.
Frequently asked questions
Got questions about growing bell peppers outdoors? You’re not alone! Here are answers to the most common concerns to help you grow a thriving pepper garden—even in small spaces.
When is the best time to plant bell peppers outside?
Plant bell peppers after the last frost when soil temps reach at least 60°F (15°C). In most regions, this means late spring to early summer. Start seeds indoors 8–10 weeks before transplanting for a head start. Pro tip: Use a soil thermometer to double-check warmth!
How long does it take for bell peppers to grow after planting?
From transplanting, expect 60–90 days to harvest, depending on the variety. Early maturing types (like ‘Sweet Banana’) may ripen faster, while heirlooms take longer. Patience pays off! Monitor plants for flowering signs—peppers form 50–70 days after flowering.
Why aren’t my bell pepper plants producing fruit?
Common culprits include too much nitrogen (focus on phosphorus/potassium for blooms), inconsistent watering (drought stress), or temperature swings (below 55°F/13°C stunts growth). Hand-pollinate flowers by gently shaking plants on calm days. Bonus: Yellowing leaves? Check for pests like aphids or fungal issues.
Can I grow bell peppers in containers or small gardens?
Bell peppers thrive in 5-gallon containers or larger with pole training (use trellises or cages). Choose compact varieties like ‘Patio Snack’ or ‘Jupiter’. Ensure pots have drainage holes and use lightweight potting mix. Rotate containers for even sun exposure.
How do I protect bell peppers from extreme heat or cold?
Bell peppers hate frost (<32°F/0°C kills them) and struggle above 90°F (32°C). Use row covers for early/late seasons or shade cloth (30%) in scorching climates. Mulch with straw to regulate soil temps. In hot zones, water deeply in the morning to prevent sunscald.
Wrapping up and next steps
Planting bell peppers outside—especially with pole-trained techniques—is a rewarding way to maximize your compact garden’s potential! 🌱 With the right soil, spacing, and care, you’ll enjoy a bountiful harvest of crisp, flavorful peppers in no time.
Now that you’re armed with tips and tricks, it’s time to get your hands dirty and watch your garden thrive.
Ready to take the next step? Start by marking your planting spots and gathering your supplies. Before you know it, you’ll be savoring homegrown peppers straight from the vine!