
Size
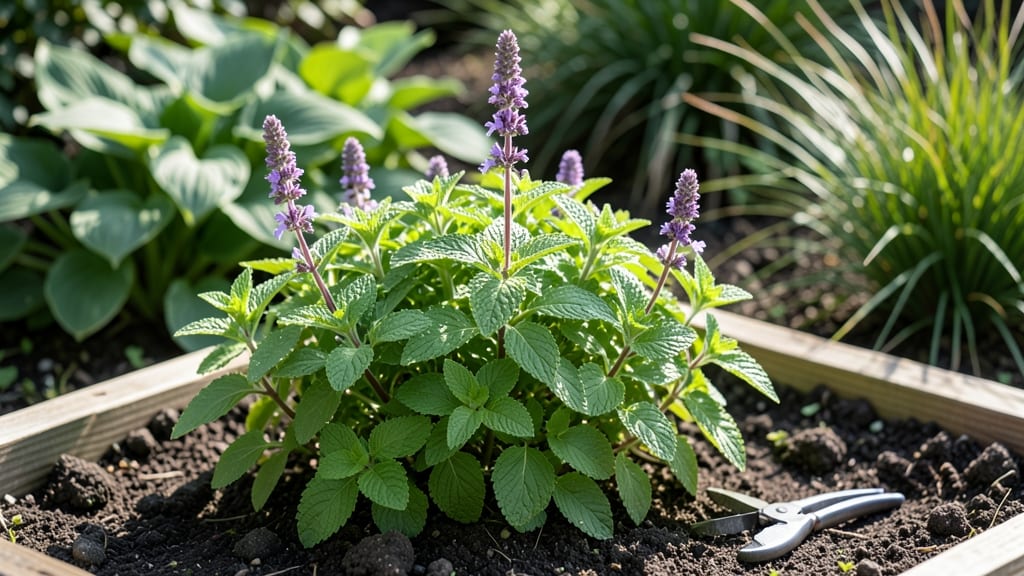
Growing peppermint outside transforms your garden into a fragrant escape. 🌿 This hardy herb thrives in partial shade, spreading aggressively to create a lush, aromatic ground cover that repels pests naturally. My first attempt nearly took over my yard—but that's exactly why it's so rewarding.
The secret lies in rich, moist soil and consistent watering. Peppermint grows from both seeds and cuttings, but divisions from established plants establish faster. Plant in early spring or fall, spacing them 18-24 inches apart to control their spread.
A well-maintained patch can produce leaves all year in mild climates. By midsummer, you'll be harvesting vibrant green leaves for teas, cocktails, or homemade remedies. The minty scent alone makes it worth growing, but the versatility in the kitchen is the real bonus.
Just watch for overgrowth—this herb means business. Works beautifully in containers too, if you want to keep it contained. Here's how to get started without the chaos!
📚 In This Guide
- What you need
- Instructions
- Tips and common mistakes
- Wrapping up and next steps
What you need
- ● Peppermint plants: 2–4 healthy peppermint plants (from a nursery or propagated from cuttings)
- ● OR 1–2 packets of peppermint seeds (if starting from scratch)
- ● Soil: Well-draining, moist but not waterlogged soil (pH 6.0–7.0)
- ○ Optional: Compost or peat moss (1–2 cups per planting hole) for nutrient boost
- ● Sunlight: Partial shade to full sun (4–6 hours of sunlight daily)
- ● Watering: Consistent moisture (water 1–2 inches per week, more in heat)
- ● Garden tools: Trowel or hand shovel
- ○ Garden gloves (optional but recommended)
- ● Measuring tape or ruler (for spacing)
- ● Mulch (straw, wood chips, or pine needles to retain moisture and suppress weeds)
- ● Fertilizer (balanced 10-10-10 or organic options like fish emulsion)
- ● Pest control (neem oil or insecticidal soap if aphids or spider mites appear)
- ● Containers (if growing in pots—12+ inches deep with drainage holes)
- ● Pruning shears (to keep plants tidy and encourage bushier growth)
Step-by-Step guide to planting peppermint in your outdoor garden
Peppermint thrives outdoors with minimal fuss—here’s how to establish it for lush, fragrant growth all season.
🌱 Step 1: Choose the Perfect Location for Peppermint
Peppermint loves partial shade to full sun but performs best with morning sunlight and afternoon shade—this prevents leaf scorch while maximizing growth. Avoid spots where it will spread uncontrollably; peppermint’s aggressive roots can overtake garden beds if unchecked. A contained area like a raised bed or large pot (at least 12 inches deep) works best.
Test the soil by squeezing a handful—it should hold moisture but not feel soggy. Peppermint prefers well-draining, moist soil with a pH of 6.0–7.0. If your soil is heavy clay, amend it with 2–3 inches of compost mixed into the top 6 inches of soil. This improves drainage while retaining the moisture peppermint craves.
🪴 Step 2: Plant Peppermint in Contained Spaces
For 4 plants, dig holes twice as wide as the root ball but no deeper. Space them 12–18 inches apart if planting in a contained bed, or use individual 12-inch pots filled with moist potting mix for easier control. Peppermint spreads via underground runners, so containers prevent it from becoming invasive.
Place each plant so the top of the root ball sits level with the soil surface—burying too deep can suffocate the crown. Gently firm the soil around the roots and water deeply until moisture reaches 4–6 inches down. You’ll know it’s right when the soil looks damp but not saturated and excess water drains within 30 minutes.
☀️ Step 3: Water and Mulch for Optimal Growth
Keep the soil consistently moist but never waterlogged—peppermint’s roots rot easily in soggy conditions. Water every 2–3 days during dry spells, aiming for 1 inch of water per week. Early morning is best to reduce evaporation and fungal risks. You’ll notice wilting leaves if underwatered or yellowing stems if overwatered.
Apply a 2-inch layer of organic mulch (straw or shredded leaves) around plants, keeping it 2 inches away from stems to prevent rot. Mulch locks in moisture, suppresses weeds, and keeps roots cool. Refresh the mulch layer every 3–4 months as it breaks down.
✂️ Step 4: Prune and Harvest for Healthy Plants
Pinch back new growth by ⅓ when plants reach 6 inches tall to encourage bushier, more fragrant foliage. Regular pruning also prevents peppermint from becoming leggy. Harvest stems just above a leaf node (where leaves meet the stem) to stimulate branching. The best time to harvest is morning, after dew has dried but before the sun intensifies.
Divide mature plants every 2–3 years to control spread. Dig up clumps in early spring, separate the roots, and replant sections in fresh soil. This rejuvenates growth and prevents the herb from crowding out other plants. Store any unused divisions in a cool, dark place with moist peat moss until ready to replant.
⏰ Step 5: Overwinter for Year-Round Productivity
Peppermint is hardy to USDA Zone 5, but in colder climates, protect it with a 2-inch layer of straw mulch before the first frost. In Zone 6 and above, it often survives winter without extra care. Trim back dead or yellowed foliage in early spring to make room for new growth. Fertilize lightly with balanced 10-10-10 fertilizer in early spring if leaves look pale or growth stalls.
Watch for powdery mildew in humid summers—improve airflow by thinning crowded stems and avoid overhead watering. If mildew appears, treat with neem oil spray and remove affected leaves immediately. With proper care, your peppermint will reward you with fragrant, harvest-ready stems for years.
Tips & tricks for perfect peppermint growth
Here's what I've learned after growing peppermint for years—these tricks will help you avoid common pitfalls and maximize your harvest.
Location Intelligence: When selecting your spot in Step 1, prioritize areas near a water source or drip irrigation system. Peppermint's thirsty roots appreciate consistent moisture, and being close to water makes your 1-inch weekly watering goal much easier to achieve. If you're using containers, place them on a saucer or elevated stand to prevent root rot from sitting water—this is especially important in cooler climates where drainage slows down.
Soil Prep Secret: Before amending your soil with 2-3 inches of compost in Step 1, mix in a handful of perlite or coarse sand into the top 6 inches. This creates tiny air pockets that improve drainage while still maintaining moisture retention. I've found this makes a huge difference in heavy clay soils where peppermint often struggles—it prevents that dreaded soggy feeling while keeping roots happy.
Planting Precision: In Step 2, when placing your 4 plants, consider arranging them in a square pattern rather than a line. This creates better air circulation between plants, reducing the risk of powdery mildew we'll discuss later. Also, if you're using pots, make sure they have drainage holes—this is non-negotiable. I learned this the hard way after my first batch of peppermint developed root rot in sealed containers.
Harvesting Hack: For Step 4's morning harvest timing, I recommend using a pair of clean, sharp scissors to cut stems just above the leaf node. This prevents damage to the main plant and encourages bushier growth. Pro tip: Harvest stems when they're about 8-10 inches tall—they'll be most fragrant at this stage. You can also harvest individual leaves throughout the growing season without waiting for full stems.
Pro Tips for Grow Peppermint Outside
- Here's what I've learned after growing peppermint for years—these tricks will help you avoid common pitfalls and maximize your harvest.
- Location Intelligence: When selecting your spot in Step 1, prioritize areas near a water source or drip irrigation system.
- Soil Prep Secret: Before amending your soil with 2-3 inches of compost in Step 1, mix in a handful of perlite or coarse sand into the top 6 inches.
Frequently asked questions
Got questions about growing peppermint outdoors? You’re not alone—this hardy herb has a few quirks! Here are answers to the most common curiosities to help you cultivate a thriving patch.
Can peppermint grow in containers, or does it need a garden bed?
Peppermint thrives in containers! Use a pot at least 12 inches deep with drainage holes to prevent root rot. Just ensure it gets 6+ hours of sunlight daily and replant every 2–3 years to refresh the soil. Pro tip: Add a layer of pebbles at the bottom to improve drainage.
Does peppermint survive winter outdoors, or should I bring it inside?
Peppermint is perennial in USDA zones 5–9 and tolerates light frost, but heavy snow or sub-zero temps may kill it. In colder climates, mulch heavily with straw or leaves. If your winters are harsh (below 10°F), consider overwintering potted plants in a garage or shed.
Why does my peppermint smell weak or taste bland?
Weak flavor often means poor sunlight or overcrowding. Peppermint needs full sun (6+ hours/day) for strong oils. Thin plants to 12–18 inches apart and harvest regularly to encourage growth. Bonus: Harvest in the morning after dew dries for peak potency!
How do I stop peppermint from spreading everywhere?
Peppermint spreads aggressively via rhizomes. Contain it by:
- Planting in containers (even buried in the ground).
- Installing a deep barrier (2–3 feet) of landscape fabric or cardboard.
- Harvesting frequently to limit energy for spreading.
Can I grow peppermint from store-bought plants, or do I need seeds?
Store-bought peppermint plants (from nurseries) are easier and faster than seeds. Just ensure they’re organic or disease-free. If using seeds, start indoors 8–10 weeks before last frost—they germinate slowly (14–21 days) in 60–70°F soil.
Wrapping up and next steps
Growing peppermint outside is a rewarding journey that brings fresh, fragrant leaves right to your fingertips—no greenhouse required! 🌿 With the right location (partial shade), soil (well-draining and moist), and a little patience, this hardy herb thrives year-round in many climates.
Whether you’re brewing tea, soothing digestion, or simply enjoying its minty aroma, your homegrown peppermint is just a few months (and a few snips) away.
Ready to dive in? Start by choosing your spot this weekend—your garden (or even a sunny windowsill) is about to get a whole lot more vibrant. Happy planting! 🌱