
Planting
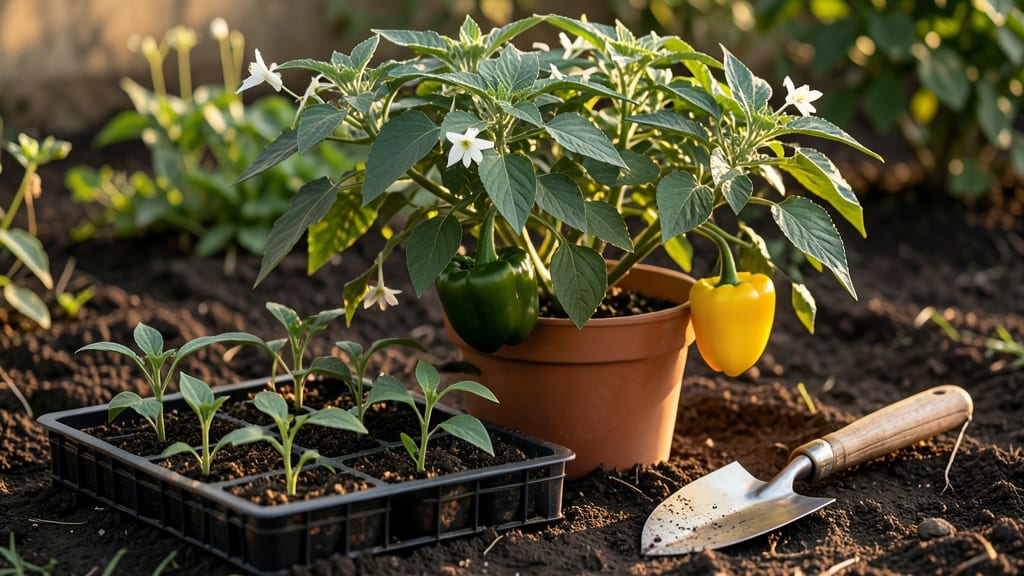
Planting bell pepper plants starts with warm soil and a sunny spot—because these heat-lovers refuse to grow when the ground is still chilly. 🌱 I’ve learned the hard way that rushing the timing means stunted plants and fewer peppers, but get it right, and you’ll harvest glossy, sweet fruits all summer long.
The secret isn’t just the right time; it’s the soil prep, spacing, and a little extra care that turns seedlings into prolific producers.
You’ll need well-draining soil rich in compost (think 50% garden soil, 30% compost, 20% perlite), a sunny location with at least 6-8 hours of direct sunlight daily, and sturdy stakes or cages for support.
Plant after the last frost when soil temps hit 60°F or warmer, and space plants 18-24 inches apart—crowding leads to disease and poor air circulation. Dig holes just deep enough to bury the plant up to its first set of leaves, then water deeply to settle the soil.
Once planted, keep the soil consistently moist but never soggy—bell peppers hate wet feet. Mulch around the base to retain moisture and deter weeds, and fertilize lightly every 2-3 weeks with a balanced organic fertilizer.
Within 4-6 weeks, you’ll see strong new growth, and by mid-summer, those first peppers will start to swell. The key? Patience and consistency—no shortcuts here.
Common mistakes like overwatering or planting too early can derail your harvest, but with these steps, you’ll avoid the pitfalls and end up with vibrant, productive plants that keep giving until frost. Next up: how to protect them from pests and diseases once they’re established. Let’s get those peppers growing!
📚 In This Guide
- What you need
- Instructions
- Tips and common mistakes
- Wrapping up and next steps
What you need
- ● Bell Pepper Seeds or Seedlings: Choose disease-resistant varieties like 'California Wonder,' 'Jupiter,' or 'Sweet Banana.' For seeds, plant 3–5 per pot; for seedlings, 1–2 per container.
- ● Containers or Garden Bed: Containers: 5–10 gallon pots with drainage holes (minimum 12" deep). Use 1–2 per plant.
- ● Garden Bed: Well-draining soil in a sunny spot (6+ hours of sunlight daily). Space plants 18–24" apart.
- ● High-Quality Potting Mix: 10–20 lbs of organic, well-draining mix (e.g., 60% peat moss, 30% perlite, 10% compost). Avoid garden soil—it’s too dense!
- ● Fertilizer: Balanced Fertilizer (10-10-10 or 5-5-5): 1–2 tbsp per plant at planting time.
- ○ Slow-Release Granules: Optional but helpful (e.g., 3–4 lbs per 100 sq ft of garden bed).
- ● Watering Can or Hose: With a gentle spray nozzle to avoid disturbing seedlings.
- ● Mulch: Straw or shredded leaves (2–3 inches thick) to retain moisture and suppress weeds.
- ● Trowel or small shovel for transplanting.
- ● Gloves to protect your hands from soil and thorns.
- ● Plant markers (e.g., popsicle sticks) to label varieties.
- ● Pruning shears for removing yellow leaves or excess growth.
- ○ Row covers or shade cloth (optional, for early planting in cool climates).
- ● Warmth: Bell peppers thrive in temperatures above 50°F (10°C). Wait until after the last frost or use a greenhouse.
- ● Sunlight: Commit to a sunny spot—peppers are not shade lovers!
- ● pH Level: Test soil pH (ideal range: 6.0–6.8). Adjust with lime (to raise pH) or sulfur (to lower) if needed.
Step-by-Step instructions for planting bell pepper plants
Here's my foolproof method for planting bell pepper starts that thrive and produce all season long.
🪴 Step 1: Prepare the Planting Site for Maximum Sun
Bell peppers crave full sun—at least 6-8 hours daily. Choose a spot that gets morning sun and afternoon light without afternoon shade. I always test my garden bed by placing a white plate where I plan to plant; if it stays cool to the touch after 2 hours, the area lacks sufficient sun.
Loosen the soil to a depth of 12 inches using a garden fork or tiller. This helps roots penetrate easily. Work in 2-3 inches of compost or well-rotted manure to enrich the soil. Peppers prefer slightly acidic to neutral soil with a pH between 6.0 and 6.8. If your soil is heavy clay, mix in 2-3 inches of sand or perlite to improve drainage.
🌱 Step 2: Harden Off and Plant Your Starts
Before planting, harden off your pepper starts by placing them outside in a sheltered spot for 1-2 hours the first day, gradually increasing to 8-10 hours over 7-10 days. This toughens the plants so they don’t shock when transplanted. Watch for wilting—if it happens, bring them back inside and extend the process by a day or two.
Dig holes just deep enough to bury the plants up to their first set of true leaves. Space them 18-24 inches apart in rows 24-36 inches apart to allow for airflow and easy harvesting. I like to plant them in a grid pattern for neatness and easier access. Gently remove each plant from its container, loosen the roots if they’re circling, and place it in the hole.
💧 Step 3: Water and Mulch for Healthy Growth
Water the plants deeply right after transplanting to settle the soil around the roots. Use 1-2 gallons of water per plant to ensure the roots make good contact with the soil. Water at the base of the plant rather than overhead to prevent fungal diseases. You’ll know the soil is moist enough when it feels damp 2-3 inches below the surface.
Apply a 2-3 inch layer of mulch around each plant, keeping it 2 inches away from the stem to prevent rot. I use straw or shredded leaves because they break down slowly and retain moisture. Mulch keeps the soil cool, reduces weeds, and helps maintain even moisture—critical for peppers, which hate dry or waterlogged soil.
☀️ Step 4: Provide Ongoing Care for a Bountiful Harvest
Keep the soil consistently moist but not soggy. Water 1-1.5 inches per week, more during hot, dry spells. Peppers are drought-sensitive, so let the top 1-2 inches of soil dry out slightly between waterings. Use a soaker hose or drip irrigation to deliver water directly to the roots and avoid wetting the leaves, which can lead to disease.
Fertilize lightly every 3-4 weeks with a balanced, water-soluble fertilizer (like 10-10-10) once the plants start flowering. I mix it at half-strength to avoid burning the roots. Watch for signs of over-fertilizing, like yellow leaves or stunted growth. Prune any suckers or damaged leaves to encourage strong growth and airflow.
✂️ Step 5: Support and Protect for Long-Term Success
As your pepper plants grow, they may need support, especially if they’re heavy with fruit. Install small stakes or cages around each plant when they reach 12 inches tall. Gently tie the main stem to the stake with soft plant ties or old fabric strips. This prevents the plants from toppling over under the weight of peppers.
Watch for pests like aphids or hornworms, which love pepper plants. I inspect my plants weekly and remove pests by hand or spray with neem oil if needed. If you notice yellowing leaves, it could signal a nutrient deficiency or overwatering. Adjust your care routine based on what you observe—peppers are forgiving but need consistent attention to thrive.
Tips & tricks for perfect bell pepper planting
These little tricks make all the difference when you're getting your pepper plants ready to thrive.
Sunlight Testing: That white plate trick in Step 1 is my secret weapon for finding the perfect spot. Place it in potential locations during the hottest part of the day—if it stays cool after 2 hours, move on. Morning sun with afternoon light is ideal, but avoid spots where afternoon shade cuts the sunlight short. I've planted in what I thought was full sun only to have peppers struggle because of hidden shade from nearby trees or structures.
Soil Prep Pro Tip: When loosening that 12-inch depth of soil in Step 1, take it slow. Overworking the soil can create a compacted layer below. Instead, use your garden fork to gently break up clumps rather than aggressively tilling. This creates better root pathways while preserving soil structure. For clay soil, mix in that 2-3 inches of sand or perlite right where you're planting—not spread it everywhere. Peppers hate soggy feet, so drainage matters more than perfect soil texture.
Harden Off Like a Pro: The gradual 7-10 day hardening process in Step 2 is non-negotiable, but here's what I do differently: Start with just 30 minutes on Day 1, not the full 1-2 hours. Watch how your plants react—if they wilt dramatically, they're not ready. Also, place them in a spot that gets morning sun but has afternoon shade during the first few days. This mimics what they'll experience after transplanting and prevents shock.
Pro Tips for Plant Bell Peppers Plants
- These little tricks make all the difference when you're getting your pepper plants ready to thrive.
- Sunlight Testing: That white plate trick in Step 1 is my secret weapon for finding the perfect spot.
- Soil Prep Pro Tip: When loosening that 12-inch depth of soil in Step 1, take it slow.
Frequently asked questions
Got questions about growing bell peppers? You’re not alone—here are answers to the most common concerns to help you grow like a pro!
What’s the best time to plant bell pepper seeds or seedlings?
Plant seeds indoors 8–10 weeks before your last frost date (typically mid-March to April in most climates). For seedlings, wait until soil is at least 60°F (15°C) and all frost risk has passed—usually after Mother’s Day in most regions. Bell peppers hate cold soil, so patience pays off!
Can I plant bell peppers in containers, or do they need a garden bed?
Bell peppers thrive in containers if the pot is at least 12–18 inches deep and wide, with drainage holes. Use a lightweight, well-draining potting mix and place containers in full sun (6+ hours daily). Just ensure they get enough water—containers dry out faster than garden beds.
Why are my bell pepper plants wilting or turning yellow?
Wilting often signals underwatering or overwatering—check soil moisture 1–2 inches down. Yellow leaves? Likely nutrient deficiency (try a balanced fertilizer) or root rot from soggy soil. If leaves curl or drop, it could be pests (aphids, spider mites) or heat stress. Prune damaged areas and adjust care ASAP!
How close can I plant bell peppers to tomatoes or other veggies?
Space bell peppers 18–24 inches apart in rows 24–36 inches apart. Avoid planting near fennel or beans (they stunt growth), but they pair well with basil, onions, or spinach. Tomatoes? Keep them 3+ feet away—they share diseases like early blight. Companion planting = happier peppers!
Do bell peppers need special care in hot or cold climates?
In hot climates, mulch to retain moisture and provide afternoon shade if temps exceed 90°F (32°C). In cool climates, use black plastic mulch or row covers to warm soil. If frost threatens, harvest early or move potted plants indoors. Bell peppers love warmth—aim for 70–85°F (21–29°C) day/night temps for best results.
Still stumped? Drop your question in the comments—we’ve got you covered!
Wrapping up and next steps
Growing your own bell peppers is a rewarding journey that brings vibrant flavors and fresh produce right to your doorstep! 🌱 With the right soil, sunlight, and care, you’ll soon be harvesting crisp, colorful peppers to enjoy in salads, stir-fries, or even homemade sauces. Start small, stay patient, and don’t forget to celebrate every milestone—your green thumb is growing stronger with each plant!
Ready to take the next step? Try experimenting with different varieties or share your newfound knowledge with fellow gardeners! Whether you’re a beginner or a seasoned pro, every seed planted today could lead to a future harvest full of delicious surprises. Happy gardening! 🌿