
Container Gardens
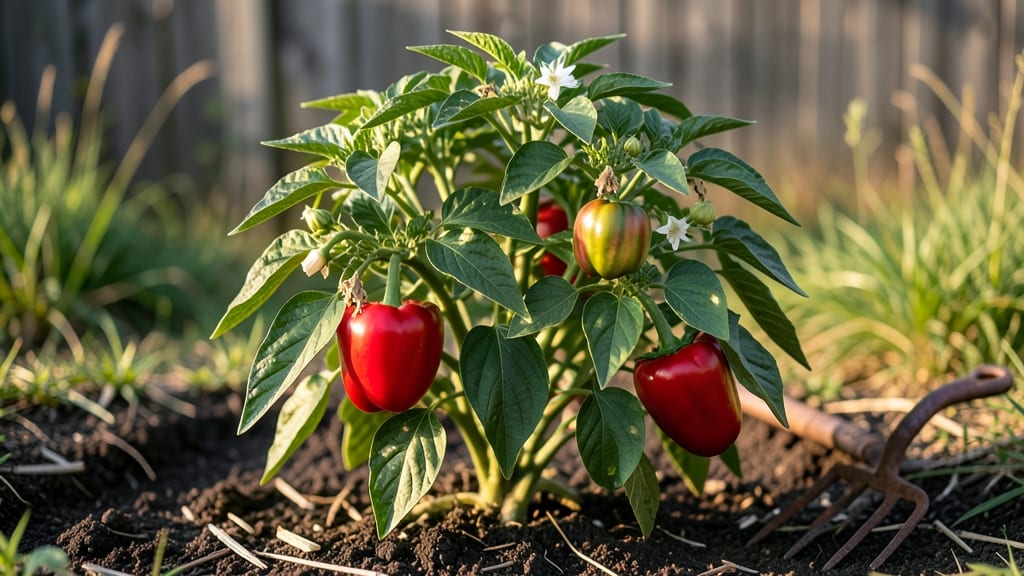
Here are some essential red pepper growing tips—and training them on poles is the game-changer you never knew you needed. 🌶️ The key isn’t just tying plants up; it’s how you prep the soil, water, and support them from day one.
Start with a well-draining mix—half potting soil, half compost—and plant seeds indoors 8-10 weeks before your last frost. Transplant seedlings outside only after soil warms to 65°F, and choose a sunny spot where they’ll get 6+ hours of light daily.
The poles themselves should be 6-8 feet tall, sturdy enough to handle heavy fruit without bending.
Here’s the game-changer: prune aggressively to encourage upward growth. Pinch off side shoots early, and tie the main stem to the pole every 12 inches. Water at the base deeply 2-3 times per week (never overhead), and feed with balanced fertilizer every 4 weeks.
By mid-summer, you’ll see long, lush vines loaded with peppers instead of sprawling plants fighting for space.
When harvest time comes, pick peppers when fully colored—don’t wait for them to overripe. Store them in a cool, dry place, and save seeds from your best varieties.
The vertical method also makes pests easier to spot (and spray off) before they become a problem. Ready to transform your garden into a pepper powerhouse?
📚 In This Guide
- What you need
- Instructions
- Tips and common mistakes
- Wrapping up and next steps
What you need
- ● 5-gallon or larger containers (per plant): Use well-draining pots with drainage holes. Pro tip: Opt for fabric grow bags for better aeration! 🌡️
- ● High-quality potting mix: A blend of 60% peat moss/coco coir, 30% perlite/vermiculite, and 10% compost (or pre-mixed veggie/container mix).
- ● Red pepper seeds or seedlings: Choose varieties suited for containers, like ‘Lunchbox’, ‘Jalapeño’, or ‘Bell Pepper’. Start seeds indoors 8-10 weeks before last frost or buy healthy transplants.
- ● Pole trellis system: 5-6 ft tall bamboo stakes or metal poles (1 per plant).
- ● Soft plant ties or twine (to secure vines without damaging stems).
- ○ Zip ties or Velcro plant straps (optional, for extra support as peppers grow).
- ● Balanced fertilizer: Use a 10-10-10 or 5-5-5 NPK ratio (follow package instructions for dilution). Pro tip: Switch to a low-nitrogen, high-phosphorus fertilizer (like 3-4-6) when flowers appear! ✨
- ○ Mulch (optional but recommended): Straw or shredded leaves to retain moisture and suppress weeds.
- ● Watering can or drip irrigation: Peppers need consistent moisture—avoid overhead watering to prevent disease.
- ● Pruning shears: For trimming suckers and shaping plants (sterilize with rubbing alcohol!).
- ● Sunlight: 6-8+ hours of direct sunlight daily. South-facing windows or a sunny patio works best.
- ● Warmth: Peppers thrive in 70-85°F soil temps. Wait until nighttime temps stay above 55°F before planting outdoors.
- ● Spacing: Place containers 18-24 inches apart to allow airflow and pole access.
- ● Patience: Pole-trained peppers take 70-90 days to mature—plan accordingly! 🎯
How to train red peppers on poles for maximum yield
Here's how I transform sprawling pepper plants into vertical powerhouses—doubling harvests while saving space.
☀️ Step 1: Select the Right Pole System for Your Climate
Choose 5-6 foot bamboo stakes or galvanized metal trellis poles for durability. I prefer 3-inch diameter bamboo because it's lightweight yet sturdy enough to support heavy pepper varieties like Jalapeño or Cayenne without bending. Drive each pole 6 inches deep into the soil near the plant's base at transplanting, angling slightly toward the prevailing sun direction. This prevents shading as the plant grows upward.
For windy areas, use two poles per plant—one on each side—tied together at the top with jute twine. The goal is to create a stable vertical frame that won't sway when peppers reach 8-12 ounces each. Install poles 2-3 weeks before transplanting so roots establish before supporting extra weight. If using a trellis, space 18 inches apart between vertical supports to allow easy access for harvesting.
🌱 Step 2: Prune for Vertical Growth During Early Development
When plants reach 12-18 inches tall, begin pruning to encourage upward growth. Remove suckers (the small shoots forming in the leaf axils) immediately—they drain energy from fruit production. I use sterilized pruning shears to make clean cuts just above the leaf node, avoiding any stem damage. Leave only the top 3-4 main stems growing vertically, as these will bear the heaviest fruit loads.
Watch for lateral branches growing horizontally—these compete with upward growth. Pinch these back within 2 weeks of transplanting to redirect energy to the main stem. You'll see thicker, sturdier stems within 3-4 weeks of consistent pruning. This vertical structure prevents peppers from touching the ground, reducing disease risk and making harvests easier.
✂️ Step 3: Tie and Train Peppers as They Grow
When the main stem reaches 24 inches, tie it to the pole using soft plant ties (not wire, which can cut into stems). I wrap the tie once around the pole and once around the stem, leaving 1 inch of slack to allow for growth. Add a second tie 12 inches higher as the plant grows, ensuring the stem stays upright without bending. Avoid tying too tightly—gentle support prevents stem damage while encouraging upward growth.
As lateral branches form, guide them horizontally along the pole using soft twine loops every 6-8 inches. This creates a fan-like structure that maximizes sun exposure for developing peppers. Prune any branches growing downward or toward the ground, as these won't receive enough light and will produce smaller fruit. You'll notice faster fruit set and larger peppers when branches are trained to face the sun.
💧 Step 4: Adjust Watering and Fertilizing for Pole-Grown Peppers
Pole-trained peppers need consistent moisture to support heavy fruit loads, but overwatering causes blossom-end rot. Water deeply 2-3 times per week, aiming for 1-1.5 gallons per plant, until the top 2 inches of soil feel dry. Use a soaker hose to deliver water at the base, avoiding wet foliage which spreads disease. I fertilize every 2 weeks with a balanced 10-10-10 formula during flowering, then switch to a low-nitrogen, high-phosphorus feed (5-10-10) once peppers form to boost fruit development.
Monitor for nutrient deficiencies—yellowing leaves indicate nitrogen needs, while purple stems signal phosphorus deficiency. Pole-trained plants may show slower early growth due to pruning, but they outproduce bush varieties by 30-50% when properly supported. Harvest peppers when fully colored (not necessarily red—some varieties stay green or turn yellow) to encourage continuous production.
⏰ Step 5: Extend the Season with Strategic Pruning
In cool climates, prune back all but the top 2 feet of growth after the first frost to protect the main stem. Cover the plant with row fabric to insulate roots and continue watering lightly. You'll often see new growth in spring, giving you a second harvest the following year. In warm climates, prune only diseased or dead branches and continue fertilizing lightly through winter for year-round production. The key is balancing growth and stress—never prune more than one-third of the plant at once.
By late summer, you'll have a dense vertical pepper plant producing dozens of peppers where a bush would yield only a handful. The secret? Consistent training, pruning, and support turn peppers from sprawling weeds into high-yielding vertical machines. Save seeds from your best peppers each year—they'll adapt to your microclimate and training system for even bigger harvests next season.
Tips & tricks for pole-trained pepper success
Transforming sprawling pepper plants into vertical powerhouses takes precision—and these insights will help you avoid common pitfalls while maximizing your harvest.
Stability is Key: The 2-3 week window before transplanting to install poles (as mentioned in Step 1) is critical. I've seen plants topple when poles weren't firmly anchored, especially in windy conditions. For extra security, pound a 6-inch metal stake next to each pole and tie them together at the base with jute twine. This creates a triangular support system that prevents swaying, which is especially important once peppers reach 8-12 ounces—that's when the weight becomes significant. The goal is to mimic nature's support structure without restricting growth.
Pruning Precision: When you're removing suckers in Step 2, don't just snip them off—make clean cuts just above the leaf node where the sucker meets the main stem. I learned this the hard way after leaving tiny stubs that attracted pests. Sterilize your pruning shears with rubbing alcohol between plants to prevent disease spread. For the lateral branches in Step 3, I recommend using soft plant ties every 6-8 inches to create those horizontal loops—they should be loose enough to allow the branch to grow but tight enough to prevent flopping. This fan-like structure is what creates optimal sun exposure for your developing peppers.
Watering Wisdom: The 2-3 times per week watering schedule in Step 4 works beautifully, but timing matters just as much as quantity. Water in the early morning so foliage has time to dry before evening—this prevents fungal diseases that thrive in damp conditions. I've found that using a soaker hose at the base delivers water exactly where it's needed without wetting leaves. For the 1-1.5 gallons per plant guideline, measure by filling a gallon jug and pouring it slowly until the top 2 inches of soil feel dry to the touch. Overwatering is the #1 cause of blossom-end rot in my experience.
Season Extension Strategy: In Step 5, the recommendation to leave 2 feet of growth in cool climates is perfect, but here's the secret: mark that 2-foot level with a bright ribbon or flag before pruning. This visual cue prevents over-pruning, which can stress the plant. For warm climates, I've had success with a light winter pruning—simply remove any dead or diseased branches while leaving the rest intact. This maintains the plant's structure without shocking it into dormancy. The key is to never remove more than one-third of the plant's foliage at once, even in winter maintenance.
Pro Tips for Red Pepper Growing Tips
- Transforming sprawling pepper plants into vertical powerhouses takes precision—and these insights will help you avoid...
- Stability is Key: The 2-3 week window before transplanting to install poles (as mentioned in Step 1) is critical. I'v...
- Pruning Precision: When you're removing suckers in Step 2, don't just snip them off—make clean cuts just above the le...
Frequently asked questions
about growing red peppers—especially when pole-trained—can make or break your harvest. Here are answers to the most common queries to help you grow like a pro!How long does it take for red peppers to mature after planting?
Most red pepper varieties take 70 to 90 days from transplanting to harvest when grown in ideal conditions. Pole-trained peppers may mature slightly faster due to better air circulation and sunlight exposure. Start seeds indoors 8–10 weeks before your last frost date for a head start!
Why are my red peppers turning yellow or dropping before ripening?
Yellowing or premature dropping often signals underwatering, overwatering, or nutrient deficiencies (like nitrogen or calcium). Check soil moisture—peppers need 1–1.5 inches of water weekly—and ensure consistent fertilizer (balanced 10-10-10 or organic options). Pro tip: Mulch to retain moisture and prevent stress!
How tall should I train my red pepper plants on a pole?
Most red pepper varieties thrive on poles 5–7 feet tall, but dwarf varieties (like ‘Lunchbox’) may only need 3–4 feet. Prune side shoots to encourage upward growth and tie stems to the pole with soft ties (like old T-shirts) to avoid damage. Never prune more than 1/3 of the plant at once!
Can I grow red peppers in containers if I don’t have a garden?
Use 5-gallon containers or larger (bigger = better for pole-trained plants) with well-draining soil. Place pots in full sun (6+ hours/day) and fertilize every 2–3 weeks. Varieties like ‘Apache’ or ‘Carolina Wonder’ are container-friendly and productive. Just ensure your container has drainage holes!
How do I know when red peppers are fully ripe?
Fully ripe red peppers should be deep red, firm, and glossy (not wrinkled or soft). For the best flavor and heat, wait until they’re fully colored—even if it takes a few extra weeks. Fun fact: The longer they stay on the vine, the sweeter they get! Harvest with pruning shears to avoid damaging the plant.
Wrapping up and next steps
Growing red peppers in containers with pole training isn’t just possible—it’s a game-changer for maximizing space and yield! 🌱 With the right mix of sun, soil, and support, you’ll enjoy vibrant, high-producing plants that reward your green thumb with bold, flavorful harvests.
Whether you’re a beginner or a seasoned gardener, these pole-trained secrets will help you transform small spaces into pepper powerhouses.
Ready to plant, climb, and harvest like a pro? Start by gathering your supplies, then review the essentials—soil, stakes, and seeds—to kick off your container garden adventure. Happy growing! 🌶️✨