
Planting
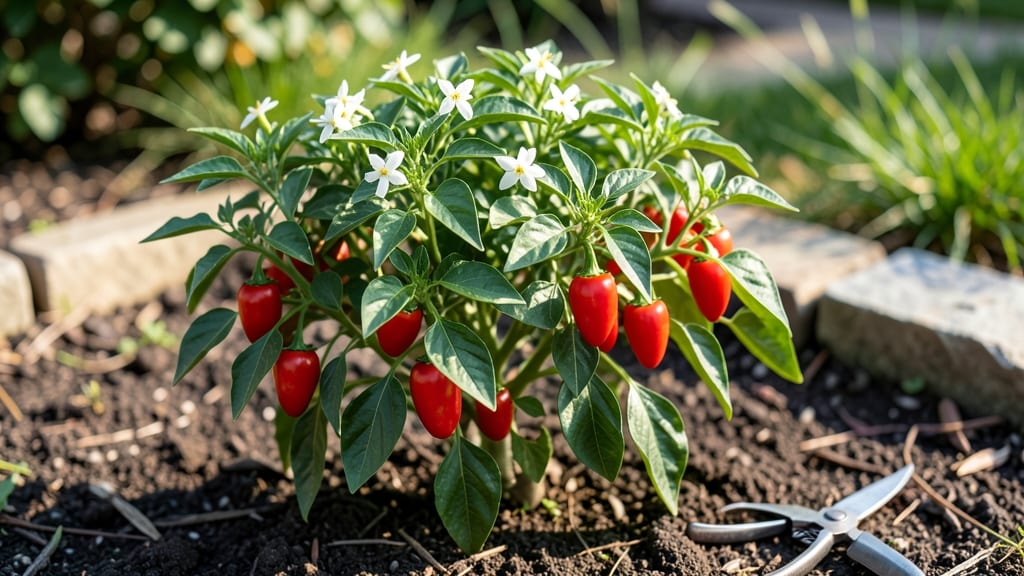
Growing a small red chili pepper plant on a pole delivers 55 days of fiery rewards in minimal space. 🌱 I’ve trained varieties like Apache and Thai Bird’s Eye up vertical supports, saving garden real estate while maximizing heat output—no sprawling vines or lost harvests.
The secret lies in matching the right soil, sunlight, and pruning to the plant’s compact growth habit, which thrives when guided upward. You’ll need well-draining potting mix, a sturdy 5-foot trellis or bamboo stake, and a sunny spot with 6+ hours of direct light daily.
Chili peppers hate soggy roots, so containers with drainage holes are non-negotiable. Varieties like ‘Apache’ (30,000 Scoville units) or ‘Thai Bird’s Eye’ produce tight clusters of peppers perfect for drying or fresh eating, and their glossy foliage adds ornamental value too.
By week 10, you’ll be harvesting bright red peppers that pack serious heat—ideal for sauces, salsas, or pickling. The pole method also keeps plants off the ground, reducing pest access and improving air circulation.
Even in small spaces, this setup yields 20-30 peppers per plant, far more than ground-level growth. Common mistakes? Overwatering (chilis prefer dry soil between drinks) and over-pruning (save that for after flowering). For extra protection, wrap the pole with reflective mulch to deter aphids.
Whether you’re a first-time grower or a heat-seeker, this method turns a tiny footprint into a spicy harvest.
📚 In This Guide
- What you need
- Instructions
- Tips and common mistakes
- Wrapping up and next steps
What you need
- ● Seeds: Small red chili pepper seeds (e.g., Capsicum annuum varieties like Thai Chili or Jalapeño). 🌶️ Buy 5–10 seeds for a good harvest.
- ● Containers or garden bed: For containers: 5–10 inch pots (1–2 plants per pot) with drainage holes.
- ● For garden beds: Well-draining soil in a sunny spot (6+ hours of sunlight daily).
- ● Potting mix: Lightweight, sterile mix with perlite or vermiculite (avoid heavy garden soil). 5–10 lbs per pot.
- ● Fertilizer: Balanced organic fertilizer (10-10-10) or compost. 1 tbsp per plant every 2–3 weeks.
- ● Watering can or hose: With a gentle spray nozzle to avoid disturbing seedlings.
- ○ Trellis or stakes: 4–6 ft tall (for pole training). Optional but recommended for compact growth.
- ● Pruning shears: Small, sharp scissors for trimming.
- ● Grow lights: If starting indoors before last frost (12–16 hours of light/day).
- ● Mulch: Straw or shredded leaves to retain moisture.
- ● Plant supports: Twine or soft ties for securing vines to trellises.
- ● Heat mat: For germinating seeds faster (70–85°F ideal).
- ● Insect netting: To protect from pests like aphids or hornworms.
Step-by-Step instructions for growing pole-trained chili peppers
Here's how to coax fiery, compact chili plants up a trellis in just 55 days.
🌱 Step 1: Start Seeds Indoors with Warmth and Light
Plant seeds 6-8 weeks before last frost in 2-3 inch pots filled with sterile seed-starting mix. I press each seed ¼ inch deep—any deeper and they'll struggle to emerge. Cover with a humidity dome or plastic wrap to trap warmth, which chilis love. Germination happens fastest at 75-85°F, so a seedling heat mat helps if your home runs cooler.
Once sprouts appear in 7-14 days, remove the cover immediately. Chili seedlings are finicky about moisture—keep soil evenly damp but never soggy. You'll see the first true leaves (not the initial seed leaves) when it's time to move them under grow lights for 14-16 hours daily. Without enough light, seedlings stretch leggy and weak, and they never recover.
☀️ Step 2: Transplant to Poles When Seedlings Are Strong
Wait until seedlings have 4-5 true leaves and a thick stem before transplanting. Bury them halfway up their poles—this encourages deep root growth. I use 5-foot bamboo stakes for each plant, securing them with soft plant ties. Place pots on a drip tray to catch excess water, since chilis hate wet feet.
Move the entire setup outdoors for 2-3 hours daily starting 1 week before transplanting. This hardening-off process prevents shock. You'll know they're ready when they bounce back from a full day outside without wilting. Transplant on an overcast afternoon to reduce stress further.
💧 Step 3: Train and Feed for Rapid Growth
As plants grow, gently weave new stems around the pole, securing with ties every 6-8 inches. Prune side shoots to encourage upward growth—chilis put energy into fruit production, not bushiness. When flowers appear, I fertilize with a balanced 10-10-10 mix every 2 weeks to support blooming and fruiting.
Water at the base deeply every 2-3 days—chilis need consistent moisture but hate soggy soil. You'll see new leaves emerge within 3-5 days after fertilizing, signaling healthy growth. If leaves yellow, you're overwatering or using too much fertilizer. Adjust immediately to prevent stress.
✂️ Step 4: Harvest and Prune for Continuous Production
Harvest peppers when they reach 3-4 inches long for peak heat and flavor. I use clean pruning shears to snip stems just above a leaf node. This encourages the plant to produce more flowers and fruit. Remove any peppers that turn yellow or mushy—they're past their prime and drain energy.
By day 55, your pole-trained chilis should be loaded with vibrant red peppers. Prune any leggy growth or crowded stems to improve airflow, which prevents disease. Store harvested peppers in a cool, dry place for up to 2 weeks, or dry them for long-term use.
Tips & tricks for pole-trained chili pepper success
Growing compact, high-yielding chili plants on poles requires precision—but these insider tricks will help you avoid common pitfalls and maximize your fiery harvest.
Warmth is Non-Negotiable: Chili seeds need that 75-85°F range to germinate efficiently. If your home runs cooler, invest in a seedling heat mat—it's the difference between waiting 14 days for sprouts and waiting weeks. I've seen germination fail completely when seeds sit in cooler soil, no matter how much water you add. Pro tip: Place your seed trays on a heating pad set to low, and watch your sprouts emerge in just 7 days!
Lighting Makes or Breaks Seedlings: The 14-16 hours of grow light in Step 1 isn't just a suggestion—it's essential. Without proper light, seedlings stretch toward any available source, becoming weak and leggy. I recommend LED grow lights positioned just 2-3 inches above the seedlings. Rotate your trays daily so all sides get equal light exposure. You'll notice the difference immediately in stocky, vibrant seedlings ready for transplanting.
Hardening Off Smartly: That 1-week hardening-off period before transplanting is crucial, but don't rush it. Start with just 2-3 hours of outdoor exposure on day 1, then gradually increase by 1 hour each day. Watch for wilting—if your seedlings droop after coming inside, they're not ready. I've seen gardeners transplant too early, only to have their chilis struggle for weeks to recover. The goal is to toughen them up without shocking their systems.
Pole Training Secrets: When securing plants to your 5-foot bamboo stakes, use soft plant ties that can stretch as the plant grows. I like to make a loose figure-eight pattern around the stem and pole, then adjust every 6-8 inches as new growth appears. This prevents the ties from cutting into the stems while still providing support. Also, burying the pole halfway encourages stronger root development—don't skip this step!
Pro Tips for Small Red Chili Pepper Plant
- Growing compact, high-yielding chili plants on poles requires precision—but these insider tricks will help you avoid ...
- Warmth is Non-Negotiable: Chili seeds need that 75-85°F range to germinate efficiently. If your home runs cooler, inv...
- Lighting Makes or Breaks Seedlings: The 14-16 hours of grow light in Step 1 isn't just a suggestion—it's essential. W...
Frequently asked questions
Got questions about growing your own small red chili pepper plant? You’re not alone! Here are some of the most common queries—plus quick answers to keep your heat-loving harvest on track.
How long does it take for a small red chili pepper plant to produce fruit?
A small red chili pepper plant (like the classic ‘Cherry Bomb’ or ‘Apache’) typically takes 60–90 days from transplant to harvest, depending on the variety and growing conditions. In this recipe, we’re targeting 55 days by using pole training and optimal spacing—just give your plant plenty of sun (6+ hours/day) and consistent watering to speed things up!
Can I grow small red chili peppers indoors?
Just mimic a greenhouse with grow lights (12–16 hours/day) and a warm spot (70–85°F). Use a 5–10 gallon pot with well-draining soil, and fertilize lightly every 2–3 weeks. If you notice leggy growth, move the lights closer—your peppers will thank you with plenty of heat!
Why aren’t my chili peppers turning red?
Red is the final stage of ripening, so if your peppers stay green or yellow, check these fixes:
- Sunlight: Ensure 6+ hours of direct sun (or supplement with grow lights).
- Temperature: Chilis need warm days (70°F+) and cool nights (55–65°F) to trigger color change.
- Patience: Some varieties (like ‘Lipstick’) take 70–90 days to redden—don’t harvest too early!
What’s the best way to use small red chili peppers in cooking?
These tiny powerhouses pack 10,000–30,000 Scoville units—perfect for adding heat without overpowering! Try:
- Drying and crushing into chili flakes for pasta or soups.
- Pickling whole for spicy garnishes on tacos or deviled eggs.
- Finely chopping into salsas, hot sauces, or stir-fries (remove seeds for milder heat).
How do I keep pests away from my chili plant?
Common culprits like aphids, spider mites, and hornworms can stress your plant. Try these organic fixes:
- Neem oil spray: Mix 1 tsp neem oil + 1 tsp mild soap in 1 quart water; spray weekly.
- Handpick pests: Check leaves daily for eggs or larvae (especially hornworms—they’re sneaky!).
- Companion planting: Grow basil or marigolds nearby to repel pests naturally.
Wrapping up and next steps
Growing your own small red chili pepper plant in just 55 days is not only rewarding but also a delicious way to add heat and flavor to your meals! 🌶️ With the right techniques—like pole training, proper sunlight, and consistent care—you’ll be harvesting vibrant peppers in no time.
Whether you’re a beginner or a seasoned gardener, this fast-growing variety proves that big flavor comes in small packages.
Ready to spice up your garden? Start with a seed or seedling today—your future dishes (and taste buds) will thank you! 🍽️