
Companion Plants
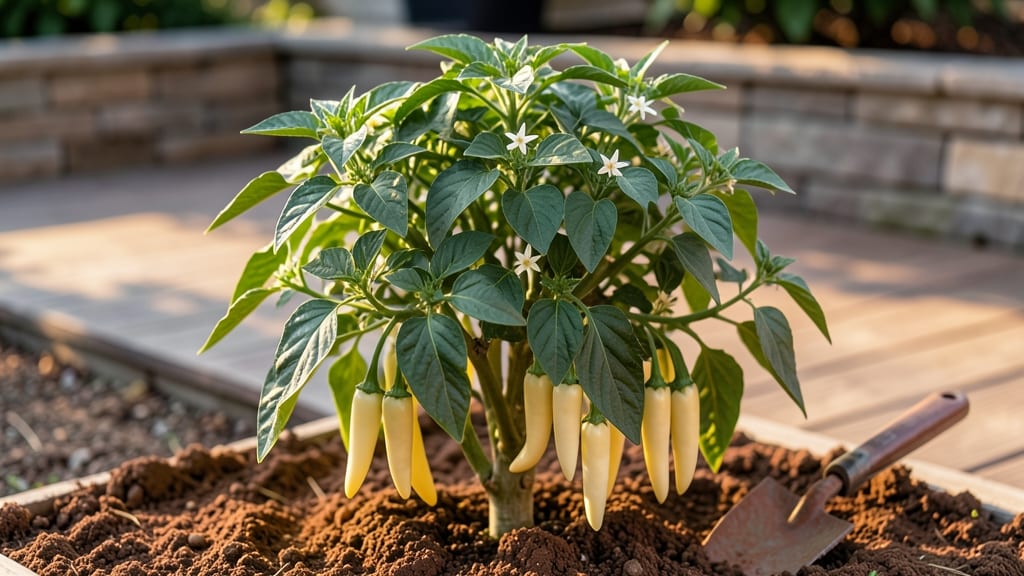
These Hungarian wax pepper plants turn a modest patch into a sunlit bounty of sweet, waxy peppers bursting with summer’s flavor—just wait until you taste their first harvest. from a plant that fits in a 2-foot space.
The secret lies in their love for vertical support and warm days, turning what could be a modest harvest into a bountiful, ornamental showpiece that doubles as a kitchen staple.
These peppers thrive in well-draining soil with a pH between 6.0 and 6.8, and they crave full sun—at least 6 to 8 hours daily.
Start seeds indoors 8 to 10 weeks before your last frost, then transplant seedlings into containers or garden beds after all danger of frost has passed. A sturdy trellis or pole is non-negotiable; without it, the plants sprawl, and yields suffer.
Water consistently—1 to 1.5 inches per week—but avoid soggy soil, which invites disease.
By midsummer, you’ll be harvesting glossy, yellow-orange peppers that ripen from green to their signature waxy hue. They’re mild (500–1,000 Scoville heat units), perfect for stuffing, roasting, or fresh snacking, and their vibrant color adds a pop to any garden bed.
The real magic? One plant can produce dozens of peppers if you prune regularly and fertilize lightly with compost or balanced fertilizer every 4 to 6 weeks.
Pests like aphids and spider mites may visit, but a strong spray of water or neem oil usually sends them packing. And here’s the kicker: these peppers keep producing until the first frost, meaning you’ll have fresh harvests late into the season.
Whether you’re growing in pots on a balcony or tucked into a raised bed, Hungarian wax peppers prove that big flavor doesn’t need big space.
📚 In This Guide
- What you need
- Instructions
- Tips and common mistakes
- Wrapping up and next steps
What you need
- ● Hungarian wax pepper seeds or seedlings: Choose Capsicum annuum varieties like ‘Hungarian Wax’ or ‘Yellow Wax.’ Start with 3–5 plants for a small harvest.
- ● Well-draining potting mix: A blend of 60% peat/coir, 30% perlite, and 10% compost (10–15 gallons per plant). Avoid heavy clay soil.
- ● Containers or garden beds: Containers: 5–7 gallon pots with drainage holes (1 per plant).
- ● Garden beds: Full sun (6+ hours/day) with raised beds or in-ground plots (amend soil with compost if needed).
- ● Fertilizer: Balanced 10-10-10 or organic options like fish emulsion (apply every 4–6 weeks).
- ● Support structures: 6–8 ft tall trellis, bamboo stakes, or tomato cages (1 per plant for pole training).
- ● Basic gardening tools: Trowel, pruning shears, gloves, and a watering can or hose with a gentle nozzle.
- ● Mulch: Straw or shredded leaves (1–2 inches) to retain moisture and suppress weeds.
- ○ Pest control (optional): Neem oil or insecticidal soap for aphids/spider mites.
- ● Climate considerations: Hungarian wax peppers thrive in USDA zones 9–11. Use a greenhouse or indoor grow lights for cooler climates.
Step-by-step guide to growing pole-trained Hungarian wax peppers
Transform limited garden space into a high-yield pepper paradise with this simple pole-training method.
Select and Prepare Your Pole System
Choose a sturdy 5-6 foot tall bamboo stake or metal trellis for each plant—Hungarian wax peppers need vertical support to handle their weight. I like to use 3-inch wide stakes because they provide extra stability without crowding the plant. Drive the stake 6 inches deep into the soil at planting time, or bury it halfway and tie it to a permanent post for easier removal later.
Real talk: if you skip this step, your plants will sprawl, peppers will touch the ground, and rot becomes a real risk. The goal is to keep the main stem upright while training side branches to grow along the pole. You'll see the difference immediately when you compare your neat vertical plants to neighbors' sprawling bushes.
Plant and Initial Training
Set your pepper plant 12-18 inches from the stake and fill the planting hole with the 5 gallons of well-draining potting mix you've prepared. Water thoroughly until the soil is evenly moist to 6 inches deep—this prevents air pockets that could strangle new roots. As the plant grows, tie the main stem to the stake using soft plant ties every 12 inches of height.
Here's the thing—don't wait until the plant is flopping over to tie it up. I check my plants weekly and adjust ties before they feel tight. You'll know you're doing it right when the plant grows straight up without bending or leaning. The first few ties are critical—they establish the plant's growth habit for the entire season.
Train Branches Along the Pole
When your plant reaches 24 inches tall, it's time to start training side branches. Look for the strongest lateral shoots growing just above a leaf node and gently tie them to the stake at a 45-degree angle. These will become your fruit-bearing branches. Remove any suckers growing in the crotch between the main stem and side branches—these compete for energy and reduce yield.
I prune aggressively here. Every time I see a weak or inward-growing branch, I snip it off immediately. You want all your plant's energy going into strong, outward-growing branches that can support heavy peppers. Watch for new growth—once you see 3-4 inches of new branch, tie it to the stake again to maintain that upward growth pattern.
Maintain and Harvest for Maximum Yield
Throughout the growing season, continue tying new growth to the stake and pruning suckers. Hungarian wax peppers produce best with 3-4 main branches trained along the pole. Water at the base 2-3 times per week during hot weather, keeping the soil consistently moist but never soggy. You'll know you're watering right when the top 2 inches of soil feel damp but not wet.
This is the moment that matters: when peppers reach 3-4 inches long and develop their signature waxy coating, they're ready to harvest. I pick every other day during peak production to encourage more fruit. The key is consistency—if you let too many peppers stay on the plant, they'll stop producing new ones. Your goal is to keep the plant focused on making more fruit, not maturing existing ones.
Winter Care and Next Season Preparation
When temperatures drop below 40°F at night, it's time to prepare your plants for winter. Cut back all foliage but leave the main stems attached to the stakes. Store the stakes with attached plants in a cool, dry basement where temperatures stay between 45-55°F. I wrap each plant in a paper towel to protect the stems and label them by variety.
Don't skip this step—proper winter storage means you'll have healthy plants ready to produce again next spring. When you replant in early spring, the established root system gives you a head start. You'll see new growth within 2-3 weeks of replanting, and your plants will be producing peppers sooner than if you started from seed each year.
Tips & tricks for pole-trained Hungarian wax peppers
These practical strategies will help you maximize your harvest while keeping your plants healthy and productive all season long.
Stake Stability is Non-Negotiable: The 5-6 foot tall bamboo stake or metal trellis you choose should be buried 6 inches deep or tied securely to a permanent post. I've learned the hard way that flimsy stakes bend under the weight of heavy pepper crops. For extra security, especially in windy areas, use two stakes per plant in an "A" formation. This creates a more stable structure that won't topple when peppers reach their full size.
Pruning Technique That Changes Everything: When you're training branches at the 24-inch mark, focus on removing suckers immediately rather than waiting. These are the small shoots that grow in the crotch between main stems and branches. I make it a habit to inspect my plants every 3-4 days during peak growth and snip any suckers I find. This aggressive pruning forces the plant to concentrate its energy on the 3-4 main branches you're training along the pole, resulting in larger, more productive peppers.
Watering Wisdom for Consistent Moisture: The 2-3 times per week watering schedule works best when you check soil moisture at the 2-inch depth mentioned in the instructions. I've found that watering at the base rather than overhead prevents fungal issues. For even more control, use a moisture meter to confirm when the top 2 inches are damp but not wet. Early morning watering gives plants time to dry slightly before evening, reducing the risk of disease.
Winter Storage That Works Every Time: When storing your plants at 45-55°F in your basement, I recommend adding a layer of newspaper around the wrapped plants before placing them in plastic bags. This extra protection prevents moisture buildup that can lead to mold. Labeling each plant with its variety and planting date is also crucial—it's amazing how quickly you forget which plant is which when you're dealing with multiple varieties.
Pro Tips for Hungarian Wax Pepper Plants
- These practical strategies will help you maximize your harvest while keeping your plants healthy and productive all s...
- Stake Stability is Non-Negotiable: The 5-6 foot tall bamboo stake or metal trellis you choose should be buried 6 inch...
- Pruning Technique That Changes Everything: When you're training branches at the 24-inch mark, focus on removing sucke...
Frequently asked questions
about growing Hungarian wax pepper plants—because even experts need a little guidance now and then!How long does it take for Hungarian wax peppers to produce fruit?
Hungarian wax pepper plants typically take 60–90 days from transplanting to produce fruit, depending on climate and growing conditions. In warmer regions, you might see peppers as early as 70 days, while cooler areas may need a little extra time. Patience is key—your first harvest will be worth the wait!
Can I grow Hungarian wax peppers in containers or small spaces?
These peppers thrive in containers (5+ gallons) or vertical gardens. Their compact growth makes them perfect for balconies, patios, or even windowsills with 6+ hours of sunlight daily. Just ensure well-draining soil and support for pole training to maximize yield in tight spaces.
What’s the best way to prevent pepper plants from bolting or flowering too early?
Bolting (premature flowering) usually happens due to temperature stress (below 50°F or above 90°F) or inconsistent watering. Keep soil consistently moist, use mulch to regulate temps, and avoid planting too early in spring. If indoors, ensure 12+ hours of light daily to delay flowering until outdoor conditions stabilize.
Are there milder alternatives to Hungarian wax peppers?
Yes! If you prefer less heat, try Banana peppers (mild, sweet) or Lipstick peppers (medium heat). For a similar growing experience but milder flavor, Poblano peppers are a great pole-trained companion. All three love the same sunny conditions and compact spaces!
How do I fix yellowing leaves on my Hungarian wax pepper plant?
Yellowing leaves often signal overwatering, nutrient deficiency, or pests. Check soil moisture—peppers hate soggy roots. For nutrients, feed with a balanced fertilizer (10-10-10) every 4–6 weeks. Inspect for aphids or spider mites; treat with neem oil if needed. Adjust sunlight if leaves are pale (they need full sun!).
Wrapping up and next steps
Growing Hungarian wax pepper plants in compact gardens is a rewarding adventure—packing bold flavors and vibrant beauty into small spaces! With the right pole-training techniques, companion plants, and care, you’ll harvest copious peppers while boosting your garden’s efficiency. 🌱✨
Ready to dive in? Start by sketching your space, gathering supplies, and planting your first pole this season. The journey from tiny seedling to pepper-laden vine is just beginning—your garden’s next spicy success story awaits!