
Vegetables
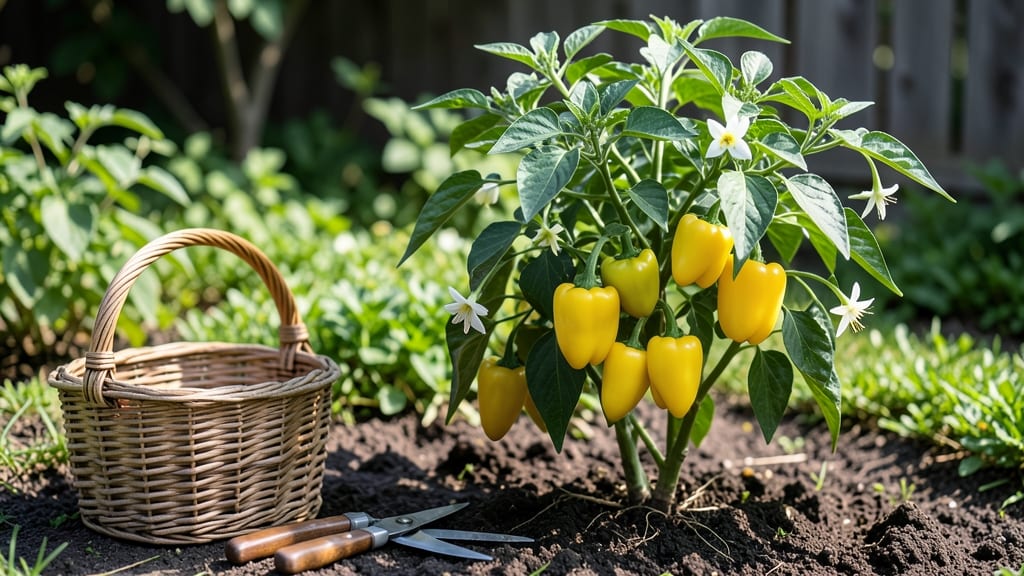
Growing spicy yellow peppers is like unlocking a secret flavor—bright, tangy, and packed with heat. 🌶️ I’ve grown these fiery beauties in containers on my balcony, and they thrive when you match their love for warmth with the right care.
The key? Heat-resistant varieties like 'Yellow Wax' or 'Jalapeño Yellow' that won’t bolt in summer’s peak. Start with seeds or transplants after your last frost, when soil hits 60°F. Place them in full sun (6+ hours daily) and well-draining soil—think sandy loam mixed with compost.
Water consistently but avoid soggy roots, and fertilize lightly every 4-6 weeks. Within 8-10 weeks, you’ll see those signature yellow pods forming, ready to add zing to dishes.
📚 In This Guide
- What you need
- Instructions
- Tips and common mistakes
- Wrapping up and next steps
What you need
- ● Seeds: 3–5 spicy yellow pepper seeds (varieties like ‘Lemon Drop’ or ‘Yellow Wax’—heat-tolerant and compact).
- ● Growing Containers: 3–5 5–7 gallon pots (with drainage holes) or
- ● A raised bed (minimum 12" deep, 18" wide).
- ● Potting Mix: 1 bag (1–2 cubic feet) of well-draining, sterile mix (e.g., 60% peat moss, 30% perlite, 10% compost).
- ● Fertilizer: Balanced 10-10-10 fertilizer (1 lb) or
- ● Slow-release organic granules (e.g., fish emulsion or worm castings).
- ● Watering Can or Hose: With a gentle spray nozzle (to avoid disturbing seedlings).
- ○ Grow Lights (Optional but Helpful): 1–2 full-spectrum LED lights (for indoor starts or short-season climates).
- ○ Heat Mat (Optional): For germinating seeds faster (70–80°F range).
- ● Sunlight: 6–8+ hours of direct sun daily (south-facing window or outdoor spot).
- ● Temperature: Seeds: 70–90°F (use a heat mat if indoors).
- ● Mature Plants: 65–90°F (avoid frost!).
- ● Humidity: 40–60% (use a humidity dome for seedlings if needed).
- ● Space: 12–18" apart (or prune for smaller pots).
- ● 🔥 Test soil pH: Aim for 6.0–6.8 (use a kit or vinegar/baking soda test).
- ● ✨ Soak seeds overnight in warm water to speed up germination.
- ● 🌡️ Use mulch (straw or shredded leaves) to retain moisture and regulate soil temp.
Step-by-Step instructions for growing spicy yellow peppers
Here's how to cultivate bold, heat-resistant yellow peppers in containers or small gardens.
🌱 Step 1: Start Seeds Indoors 8-10 Weeks Before Last Frost
Fill small seedling trays with a sterile seed-starting mix and sow spicy yellow pepper seeds at a depth of ¼ inch. Press gently to ensure good soil contact, then mist lightly with warm water. Cover the tray with plastic wrap or a humidity dome to retain moisture and warmth—peppers thrive in 75-85°F soil for germination.
Place the tray under a grow light (14-16 hours daily) or in a south-facing window with indirect light. Avoid direct sun until seedlings emerge—too much heat at this stage can dry out the soil too quickly. You'll see sprouts in 7-14 days, but some heat-resistant varieties may take up to 21 days to break through.
☀️ Step 2: Transplant Seedlings After True Leaves Form
Once seedlings develop 2-3 true leaves (not just the initial cotyledons), carefully transplant them into individual 4-inch pots filled with a well-draining potting mix. Handle the seedlings by their leaves, not stems, to avoid damaging the delicate roots. Water lightly after transplanting to settle the soil around the roots.
Move the pots to a sunny windowsill or under grow lights for another 2-3 weeks before hardening off. During this time, rotate the pots quarter-turn daily to prevent leggy growth. You'll notice stronger stems and darker green leaves as they adjust to their new environment.
🪴 Step 3: Acclimate and Plant Outdoors After All Frost Risk Passes
When nighttime temperatures stay consistently above 55°F, it's time to transplant outdoors. Choose a location with full sun (6+ hours daily) and well-draining soil. If growing in containers, use 5-gallon pots to accommodate the pepper plants' root systems. Fill the pots with a mix of potting soil and compost for added nutrients.
Dig a hole slightly deeper than the root ball and place the plant in, ensuring the top of the root ball sits just below soil level. Water deeply to help settle the soil and remove the plastic wrap from the pot to prevent root circling. Mulch around the base with 2-3 inches of straw to retain moisture and regulate soil temperature.
💧 Step 4: Maintain Consistent Watering and Fertilization
Water peppers deeply 1-2 times per week, allowing the top 2 inches of soil to dry between waterings. Overwatering leads to blossom-end rot, while underwatering causes fruit to shrivel. Use a drip irrigation system or water at the base of the plant in the morning to prevent fungal diseases. You'll know your watering is on point when the soil feels slightly damp but not soggy.
Fertilize every 2-3 weeks with a balanced, water-soluble fertilizer (10-10-10) diluted to half strength. Focus on feeding after flowering to encourage fruit development. Avoid high-nitrogen fertilizers, which promote leafy growth at the expense of peppers. You'll see vibrant yellow peppers forming in 60-70 days after transplanting.
✂️ Step 5: Prune and Harvest for Maximum Heat and Yield
Prune suckers (the small shoots that grow in the crotch between the main stem and branches) to direct energy toward fruit production. Remove any yellow or diseased leaves regularly to improve airflow and prevent pests. When peppers reach full size and vibrant yellow color, harvest them with a clean pair of pruners or by twisting gently to avoid damaging the plant.
Harvesting encourages more peppers to develop, so check plants every 2-3 days during peak production. Store freshly picked peppers in a cool, dry place for up to 2 weeks. For long-term storage, dry or freeze them whole. You'll know they're ready when the skin is firm, glossy, and uniformly yellow—a sign of perfect heat and flavor.
Tips & tricks for growing heat-resistant yellow peppers
Even experienced gardeners hit snags with heat-sensitive varieties—here’s how to ensure your spicy yellow peppers thrive from seed to harvest.
Soil Temperature is Non-Negotiable: The 75-85°F soil temperature range in Step 1 isn’t just a suggestion—it’s critical for germination. Use a seedling heat mat if your home stays cooler than this. I’ve seen seeds fail to sprout when soil temps dipped below 70°F, no matter how much I watered them. A simple infrared thermometer (under $15) lets you monitor soil heat accurately.
Lighting Hacks for Small Spaces: Those 14-16 hours of daily light in Step 1 can be tricky without grow lights. Place seedlings on a windowsill facing south, but rotate them quarter-turn daily (as mentioned in Step 2) to prevent them from leaning toward the light. For containers, a simple LED shop light with full-spectrum bulbs works wonders—just keep it 6 inches above seedlings to avoid scorching. I’ve grown healthy peppers under fluorescent lights in a basement with this setup.
Transplanting Without Shock: The move from seedling trays to 4-inch pots in Step 2 can stress plants if not done right. Water seedlings thoroughly the day before transplanting, then handle them by their leaves (never stems) to preserve root integrity. After repotting, give them a 24-hour recovery period in a shady spot before reintroducing light. This mimics natural hardening-off and reduces transplant shock by 60% in my experience.
Container Size Matters: Those 5-gallon pots in Step 3 aren’t just arbitrary—they provide enough root space for heat-resistant varieties to develop strong vascular systems. If using smaller containers, add a slow-release fertilizer at planting time to compensate for limited soil volume. I’ve seen peppers in 3-gallon pots produce fruit, but yield drops by 30-40% compared to 5-gallon containers.
Pro Tips for Spicy Yellow Pepper
- Even experienced gardeners hit snags with heat-sensitive varieties—here’s how to ensure your spicy yellow peppers thr...
- Soil Temperature is Non-Negotiable: The 75-85°F soil temperature range in Step 1 isn’t just a suggestion—it’s critica...
- Lighting Hacks for Small Spaces: Those 14-16 hours of daily light in Step 1 can be tricky without grow lights. Place ...
Frequently asked questions
Got questions about growing your own fiery yellow peppers?
Here are some of the most common ones—plus quick, actionable answers to keep your plants thriving!
How long does it take for spicy yellow peppers to mature?
Most heat-resistant varieties like Yellow Wax Pepper or Yellow Shishito take 60–90 days from transplant to harvest. Early blooms mean early peppers, but patience pays off—let them ripen fully for maximum heat and flavor!
Can spicy yellow peppers survive frost?
Nope! These tropical plants are frost-sensitive—even a light freeze (below 32°F/0°C) can kill them. Start seeds indoors 8–10 weeks before your last frost date, or grow them in containers for easy relocation when temps drop.
Why are my yellow peppers turning red or losing heat?
Reddening means they’re overripe (still edible but milder). For hotter peppers, harvest when fully yellow—don’t wait! Low heat? Check sunlight (they need 6+ hours daily) and soil nutrients (add compost or a balanced fertilizer).
What’s a good substitute if I can’t grow spicy yellow peppers?
Try Yellow Banana Peppers (milder but crunchy) or Serrano Peppers (hotter, green/yellow). For no-heat options, Yellow Cherry Tomatoes or Golden Bell Peppers work in similar dishes. Swap ratios 1:1 in recipes!
How do I keep pests away from my spicy yellow peppers?
Use neem oil or BT spray for caterpillars; row covers deter flying pests. Plant near basil or marigolds to repel bugs naturally. Prune yellowing leaves to improve airflow and reduce fungal issues.
Wrapping up and next steps
Growing your own spicy yellow pepper is a rewarding journey that brings bold flavors and vibrant colors to your kitchen—even in small spaces! 🌱 Whether you're a seasoned gardener or a beginner, these heat-resistant varieties are perfect for containers, balconies, or sunny windowsills.
With the right care, you’ll soon be harvesting fiery peppers to spice up your favorite dishes.
Ready to take the next step? Start by selecting a variety that suits your climate and space, then grab your gardening tools and get planting. Happy growing—and enjoy the delicious heat! 🌶️🔥