
Container Gardens
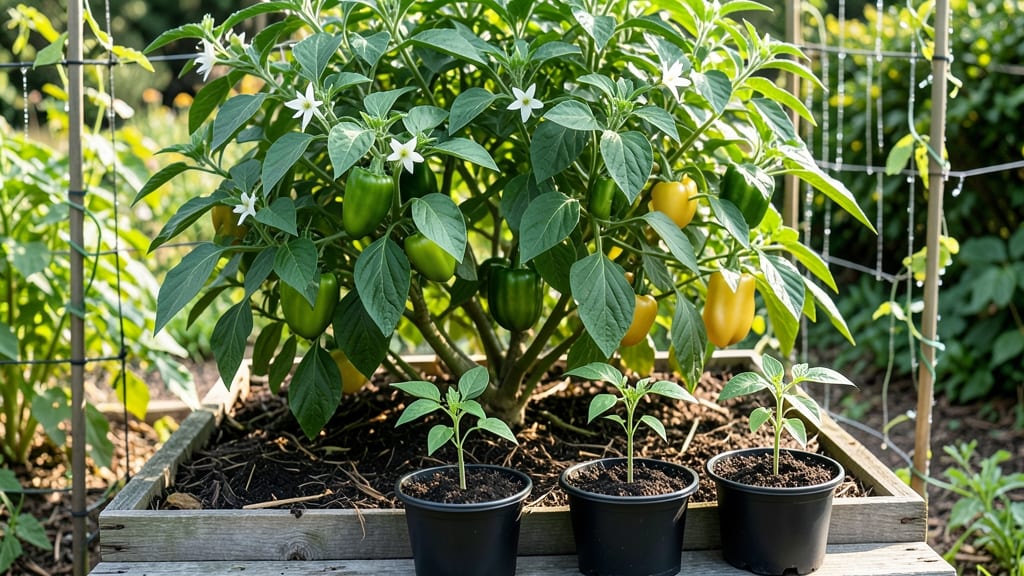
Growing bell peppers in pots transforms your balcony into a pepper patch—no yard needed. 🌱 I’ve turned my tiny patio into a mini pepper farm by training plants vertically, and the results? A steady harvest of sweet, plump peppers all summer long.
The key is choosing the right pots, soil, and a little upward training magic to maximize space without sacrificing yield. You’ll need 5-gallon containers (minimum) for each plant, well-draining potting mix, and a sturdy trellis or cage to guide their growth upward.
Bell peppers crave 6-8 hours of direct sun daily, so south-facing spots or grow lights work best. Water consistently—keep soil moist but never soggy—and feed with balanced fertilizer every 4-6 weeks. The pole-trained method isn’t just space-saving; it also improves air circulation, reducing common issues like blight.
By midsummer, you’ll be snipping ripe peppers straight from your vertical garden. The plants stay compact, the harvest never stops, and you avoid the stunted growth that plagues crowded pots. Even my black thumb can’t kill these when done right—just follow the light, water, and support rules.
This method works for apartments, rooftops, or even sunny windowsills. Whether you’re growing one plant or a whole pepper collection, the vertical trick makes it foolproof. Let’s get those pots planted!
📚 In This Guide
- What you need
- Instructions
- Tips and common mistakes
- Wrapping up and next steps
What you need
- ● Containers: 5-gallon pots (or larger) with drainage holes—at least 12–18 inches deep for pole-trained varieties. Quantity: 1–2 pots per plant (if training vertically).
- ● Potting Mix: High-quality, well-draining container mix (avoid garden soil). Quantity: 1–2 bags (2–3 cubic feet) per pot.
- ● Bell Pepper Plants: Start with transplants (6–8 weeks old) or seeds (if starting indoors). Quantity: 1–2 plants per pot (or 1 plant per 2 pots for pole training).
- ● Support System: Pole or Trellis: 6–8 ft tall bamboo stakes, metal cages, or a freestanding trellis (diameter: 4–6 inches).
- ● Soft Ties: Garden twine, plant clips, or velcro plant ties (avoid wire—it can damage stems!).
- ● Fertilizer: Balanced Fertilizer: 10-10-10 or 5-5-5 (organic or synthetic). Quantity: 1 tbsp per plant at planting + monthly.
- ○ Tomato/Cucumber Fertilizer: High in potassium (e.g., 5-10-10) for fruiting. Optional but recommended.
- ● Gloves: Gardening gloves (nitrile or leather for durability).
- ● Trowel or Spade: For planting and mixing soil.
- ● Watering Can or Hose: With a gentle spray nozzle (avoid overhead watering to prevent disease).
- ○ Mulch: Straw or shredded leaves (to retain moisture). Optional but helpful!
- ○ Pruning Shears: For trimming suckers and shaping plants. Optional for maintenance.
- ○ pH Test Kit: To check soil pH (ideal range: 6.0–6.8). Optional but recommended for troubleshooting.
- ● Sunlight: 6–8+ hours of full sun daily (south-facing windows or balcony work for smaller pots).
- ● Warmth: Bell peppers thrive in 70–85°F soil temps. Wait until after the last frost or use a heat mat for early starts.
- ● Space: Ensure pots are 12+ inches apart for airflow (critical for disease prevention!).
Step-by-step instructions for pole-trained bell peppers in pots
Here's how I grow sweet, prolific bell peppers in small spaces using simple training techniques.
🪴 Step 1: Choose the Right Containers and Drainage
Select pots at least 12-14 inches deep with drainage holes—bell peppers need room for roots to spread and water to escape. I use fabric grow bags because they prevent root circling and allow excess moisture to evaporate through the sides. If using traditional pots, drill extra holes if they only have one small drainage opening.
Place a 2-inch layer of coarse gravel or perlite at the bottom to improve drainage. This prevents soggy soil that leads to root rot, which is especially critical in containers where water pools easily. For four plants, you'll need four pots of this size—don't crowd them, even if space is tight.
🌱 Step 2: Prepare Soil and Plant Seedlings
Fill pots with a mix of 60% premium potting soil and 40% compost to give roots both structure and nutrients. I avoid garden soil—it compacts in containers and blocks root growth. Moisten the mix until it feels like a damp sponge, then create a planting hole about 2 inches deeper than the seedling's root ball.
Gently remove the seedling from its nursery pot, loosen the roots if they're circling, and place it in the hole so the top of the root ball sits ½ inch below the pot's rim. This prevents soil from washing away when you water. Press lightly around the base to eliminate air pockets, then water deeply until moisture runs from the drainage holes.
☀️ Step 3: Set Up Support and Light Immediately
Install a 5-foot bamboo stake or trellis in each pot right after planting. Press it firmly into the soil so it doesn't wobble—you'll be tying vines to it later. Bell peppers grow upright but become top-heavy with fruit, so sturdy support prevents snapping. Place pots where they'll get 6-8 hours of direct sun daily—a south-facing window or grow light setup works best.
Watch for leggy growth (long, pale stems) in the first week—that means your light isn't strong enough. Move the pots within 6 inches of a grow light or to a sunnier spot immediately. You'll see stronger stems and darker green leaves within days of adjusting the light.
💧 Step 4: Water and Fertilize for Continuous Growth
Water when the top 2 inches of soil feel dry to the touch, which usually means every 2-3 days in warm weather. I water at the base in the morning to prevent fungal issues from evening moisture. Let excess water drain completely—never let pots sit in saucers of standing water, even for a few hours.
Start fertilizing with a balanced liquid fertilizer (10-10-10) two weeks after planting, then every 2 weeks thereafter. You'll notice new leaves forming and buds setting within a week of consistent feeding. Reduce fertilizer if leaves yellow between veins—this means you're overdoing it.
✂️ Step 5: Train and Prune for Maximum Yield
When plants reach 12 inches tall, begin tying the main stem to the stake with soft plant ties or strips of old fabric. Gently wrap the vine around the stake and secure it—don't pull too tight or you'll restrict growth. As side shoots form in the leaf axils, pinch off all but the top 2 leaves of each branch to encourage upward growth rather than bushiness.
Remove any flowers that appear below the first 18 inches of the plant—these won't ripen properly in containers. You'll see fruit set more heavily on the upper portions of the plant. Harvest peppers when they reach full color but are still firm to the touch. This encourages continuous production throughout the season.
Tips & tricks for pole-trained bell peppers in pots
Here's what nobody tells you about growing peppers in containers—these tricks will help you avoid common pitfalls and maximize your harvest.
Container Depth Matters: The 12-14 inch depth requirement isn't just arbitrary—bell pepper roots can grow surprisingly deep, especially when trained vertically. If you're using shallower pots, you'll notice stunted growth and fewer peppers. I've seen plants in 10-inch pots struggle to produce more than 3 peppers total, while the same variety in 14-inch pots gave me 12-15 peppers each season. The extra 2 inches makes all the difference for root expansion.
Light is Everything: Those 6-8 hours of direct sun are non-negotiable, especially in containers where plants can't seek out sunlight. I've learned the hard way that even a small window with indirect light won't cut it—you'll see weak stems and pale leaves. If your space only gets 4-5 hours of sun, supplement with a grow light for 12-14 hours daily. The light should be within 6 inches of the plant tops for best results, and I've found LED grow lights are more energy-efficient than fluorescent options.
Support System Secret: The 5-foot bamboo stakes might seem flimsy, but they're actually perfect for this purpose. What nobody tells you is to install them at a slight angle (about 10 degrees) rather than straight up. This creates a natural spiral growth pattern that prevents the plant from toppling over when heavy with fruit. I also reinforce the base by tying the stake to a small rock buried in the pot's soil for extra stability.
Pruning Strategy: When you see those side shoots forming in Step 5, here's the thing: pinch off all but the top 2 leaves of each branch, but leave the actual shoot itself. Many guides tell you to remove the entire shoot, but I've found that leaving it (while pinching the leaves) encourages more vigorous upward growth. The plant will naturally direct energy toward the main stem and upper branches where it can produce fruit more efficiently.
Pro Tips for Planting Bell Peppers In Pots
- Here's what nobody tells you about growing peppers in containers—these tricks will help you avoid common pitfalls and maximize your harvest.
- Container Depth Matters: The 12-14 inch depth requirement isn't just arbitrary—bell pepper roots can grow surprisingly deep, especially when trained vertically.
- Light is Everything: Those 6-8 hours of direct sun are non-negotiable, especially in containers where plants can't seek out sunlight.
Frequently asked questions
Got questions about growing bell peppers in pots? You’re not alone! Here are answers to the most common concerns—from timing to troubleshooting—so you can grow like a pro, even in small spaces.
What’s the best time to plant bell pepper seeds or seedlings in pots?
Start seeds indoors 8–10 weeks before your last frost date (or buy seedlings from a nursery). Transplant them outdoors only after soil temps hit 60°F+ (15°C+)—bell peppers are heat-lovers! Use black pots to warm soil faster if needed.
How deep should the pots be for pole-trained bell peppers?
Pots need at least 12–18 inches deep for pole-trained peppers (deeper = more roots = bigger harvests!). Add 5–10 inches of compost at the bottom for drainage and nutrients. If space is tight, opt for self-watering containers to keep roots happy.
Can I grow bell peppers in pots without staking or trellising?
Yes, but expect smaller yields and more sprawling plants. If you skip staking, choose bush varieties (like ‘Jupiter’) and prune regularly to shape growth. For pole-trained peppers, use a cage, trellis, or bamboo stakes—they’ll reward you with heavier, straighter fruit!
Why are my pepper leaves turning yellow, even with good care?
Yellow leaves usually signal overwatering or poor drainage. Let soil dry slightly between waterings (stick your finger in—top inch should be dry). Check for root rot (smelly, mushy roots) and repot if needed. Too much nitrogen can also cause this—balance with phosphorus/potassium fertilizers.
What’s the easiest way to pollinate bell peppers in pots?
Peppers are self-pollinating, but gentle help boosts fruit set! On warm, dry mornings, tap the plant’s frame near flowers or use a small paintbrush to transfer pollen. Avoid windy days—it can scatter pollen away.
Can I reuse the same pots year after year for bell peppers?
Yes, but sterilize pots first! Scrub with soapy water, then rinse with a 1:10 bleach-water mix (or baking soda). Replace old soil completely to prevent disease buildup. Pro tip: Add fresh compost to replenish nutrients lost over time.
Wrapping up and next steps
Growing bell peppers in pots—especially with pole training—is a rewarding way to enjoy fresh, homegrown veggies, even in small spaces! 🌱 With the right containers, support, and care, you’ll harvest vibrant peppers all season long.
Now that you’re armed with tips and answers, it’s time to roll up your sleeves and plant—your future meals (and bragging rights) will thank you!
Ready to take the next step? Start by prepping your pots and seedlings this weekend—your garden (and taste buds) won’t wait!