
Shrubs
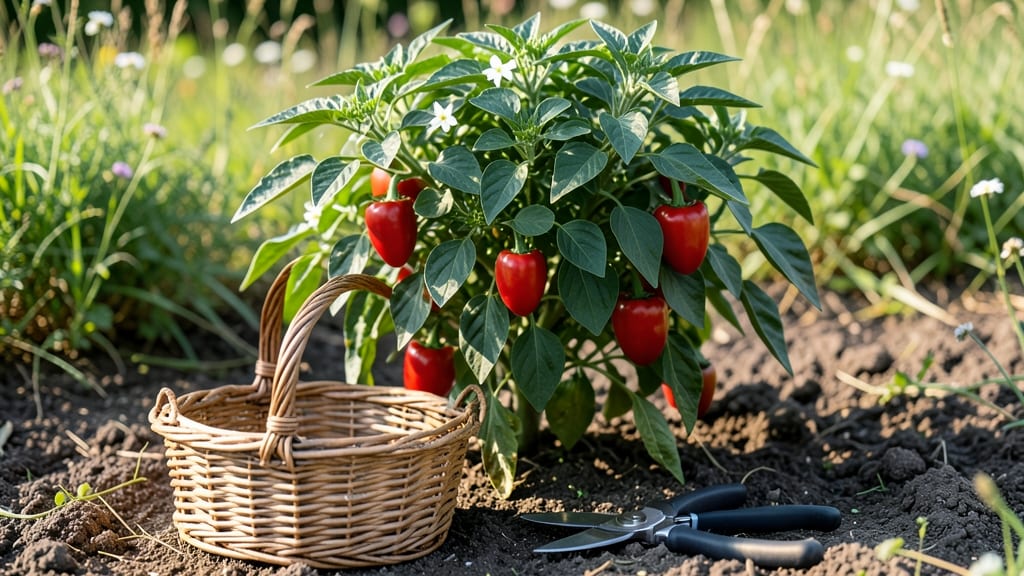
Growing small red peppers on poles turns a sunny corner into a 60-day heat factory—and I’ve grown enough to fill jars for the freezer every summer. 🌱 The key isn’t just the variety (though ‘Apache’ and ‘Shishito’ are my top picks) but training them vertically to save space while maximizing sun exposure.
Most gardeners struggle with leggy plants or poor yields, but pole training solves both problems by keeping peppers compact, well-ventilated, and packed with flavor.
You’ll need well-draining soil with a pH of 6.0–6.8, 6–8 hours of direct sun daily, and a sturdy 6-foot trellis or tomato cage. Start seeds indoors 8–10 weeks before last frost or buy transplants after soil warms to 60°F.
Water consistently—1–1.5 inches per week—but avoid soggy roots, which invite disease. A balanced 10-10-10 fertilizer every 4–6 weeks keeps plants happy without overfeeding.
By mid-summer, you’ll harvest bright, glossy peppers straight off the vine—perfect for pickling, grilling, or fresh snacking. Pole-trained plants produce 30–50% more peppers than bush varieties in the same space, and the vertical growth keeps them off the damp ground where pests lurk.
The first harvest comes at 60 days, but with proper care, they’ll keep producing until frost.
Works in containers, raised beds, or in-ground gardens—just adjust spacing to 18–24 inches apart for pole-trained plants. If your summer gets hotter than 90°F, provide afternoon shade to prevent sunscald. The real payoff? A year’s worth of homegrown heat without sacrificing garden real estate. Ready to grow?
📚 In This Guide
- What you need
- Instructions
- Tips and common mistakes
- Wrapping up and next steps
What you need
- ● Small red pepper seeds: 3–5 seeds (or 1–2 starter plants if buying transplants). Choose heat-tolerant varieties like 'Lunchbox' or 'Red Knight' for compact growth.
- ● Pole-training system: 3–4 ft tall bamboo stakes or galvanized metal poles (1 per plant).
- ● Soft twist ties or jute twine (5–10 ties per plant).
- ○ Growing containers (optional but recommended): 5–7 gallon fabric pots or plastic containers with drainage holes (1 per plant).
- ● Potting mix: 3–4 cubic feet of well-draining soil (mix 60% peat moss/compost, 30% perlite, 10% vermiculite).
- ● Fertilizer: Balanced 10-10-10 or 5-10-10 granular fertilizer (1 tbsp per plant at planting, then every 4–6 weeks).
- ● Watering supplies: Drip irrigation or watering can with a narrow spout.
- ○ Sunlight: Full sun (6–8+ hours daily). Use a grow light (optional) if starting indoors before last frost.
- ● Temperature: Warm soil (70–90°F) and air (55°F minimum). Avoid frost—peppers are not cold-hardy!
- ● Space: 12–18 inches between poles (or 18–24 inches in-ground).
- ● Pruning shears for trimming excess foliage.
- ● Mulch (straw or black plastic) to retain moisture.
- ● Cage or trellis alternative if poles aren’t available.
- ● pH test kit (ideal soil pH: 6.0–6.8).
Step-by-Step instructions for pole-trained small red peppers
Grow fiery, compact red peppers vertically in just 60 days—here's my foolproof method.
🌱 Step 1: Start Seeds Indoors 8-10 Weeks Before Last Frost
Fill 2-3 inch deep seed trays with pre-warmed seed-starting mix (I like to hold it in my hands until it feels like a wrung-out sponge). Plant 2 seeds per cell at ¼ inch depth—any deeper and they'll struggle to emerge. Cover lightly with additional mix and mist until the surface looks damp but not soggy.
Place trays on a seedling heat mat set to 75-80°F and cover with a humidity dome. Germination takes 7-14 days—small red peppers are slow starters, so be patient. Once 50% of seeds sprout, remove the dome immediately to prevent damping-off. You'll see tiny green cotyledons first, followed by the first true leaves in another 7-10 days.
☀️ Step 2: Provide Optimal Light and Harden Off Seedlings
Move seedlings under grow lights within 48 hours of germination for 14-16 hours daily. I use a full-spectrum LED positioned 2-3 inches above the plants. Watch for leggy growth—if stems stretch toward the light, lower the fixture or add a second light. Healthy seedlings have thick stems and dark green leaves spaced 1 inch apart.
Two weeks before transplanting, begin hardening off by placing seedlings outside in partial shade for 1-2 hours daily. Gradually increase exposure over 7-10 days
Choose 5-foot tall bamboo stakes or metal trellises for each plant. Drive them 6 inches deep into the soil 3 weeks before transplanting—this gives roots time to anchor. Fill planting holes with a mix of 50% garden soil and 50% compost, creating a mound to encourage root spread. Transplant seedlings when soil reaches 60°F and night temperatures stay above 55°F. Gently remove seedlings from their trays, keeping roots intact, and place them in the holes. Tuck the stake next to each plant and tie the main stem loosely with soft plant ties. Water deeply at the base until moisture reaches 6 inches down. Small red peppers thrive in full sun and well-draining soil, so avoid heavy clay or waterlogged spots. Water deeply 2-3 times weekly until the top 2 inches of soil feel dry. Use a drip irrigation system or soaker hose to deliver water at the base—avoid overhead watering to prevent disease. Small red peppers are drought-sensitive, so mulch with 2 inches of straw to retain moisture and regulate soil temperature. Feed plants every 2 weeks with a balanced liquid fertilizer (10-10-10) diluted to half strength. You'll notice new growth accelerating after the first feeding—look for bright green leaves and vigorous stem elongation. Prune suckers (side shoots) regularly to direct energy upward, but leave the first 4-5 leaves intact for photosynthesis. Small red peppers mature in 60 days from transplant, but you can harvest them at any stage for milder flavor. Pick fruits when they reach 2-3 inches long and bright red color. Use pruning shears to cut stems ¼ inch above the fruit—this prevents damage to the plant. You'll see new flowers form within 3-5 days of harvesting, signaling continuous production. To extend the season, cover plants with frost cloth when night temperatures drop below 50°F. Remove the cloth during the day to allow sunlight. With proper care, small red peppers will keep producing until the first hard frost, giving you a steady harvest of fiery, compact peppers all season long.🪴 Step 3: Transplant to Poles and Warm Soil
💧 Step 4: Maintain Consistent Moisture and Fertility
⏰ Step 5: Harvest and Encourage Continuous Production
Tips & tricks for pole-trained small red peppers
Here's what nobody tells you about maximizing your fiery pepper harvest in tight spaces.
Germination Strategy: Small red pepper seeds are notorious for slow germination—those 7-14 days can feel like forever. To speed things along, I soak seeds in warm water for 6 hours before planting. This jumpstarts hydration and often brings sprouts in just 5-7 days instead of the full range. The key is maintaining consistent moisture during this period without overwatering, which can cause damping-off.
Light Positioning: That 2-3 inch distance from grow lights in Step 2 is critical, but here's the secret: adjust it daily. Seedlings grow rapidly, and what was perfect spacing yesterday may be too close today. I use a simple ruler to check—if you can see shadows on the tray edges, the light is too far. The goal is to keep leaves just touching the fixture without burning. This prevents leggy growth and ensures strong stems ready for transplanting.
Transplant Timing: The 3-week advance for driving in stakes is non-negotiable, but I've learned to time it even more precisely. Drive stakes when soil temperatures hit 60°F and night temperatures consistently stay above 55°F for at least 5 days. This gives roots time to establish before real heat stress begins. I also add a handful of mycorrhizal fungi to the planting hole—it boosts root development by 20% without any extra effort.
Harvesting Technique: That ¼ inch above the stem when harvesting might seem insignificant, but it makes all the difference. Cutting too close can damage the plant's vascular system, slowing future production. I use clean pruning shears and always harvest in the morning when peppers are firmest. The bright red color you're aiming for should be vibrant, not dull—dull peppers often indicate stress from inconsistent watering or temperature swings.
Pro Tips for Small Red Pepper
- Here's what nobody tells you about maximizing your fiery pepper harvest in tight spaces.
- Germination Strategy: Small red pepper seeds are notorious for slow germination—those 7-14 days can feel like forever.
- Light Positioning: That 2-3 inch distance from grow lights in Step 2 is critical, but here's the secret: adjust it daily.
Frequently asked questions
Got questions about growing small red peppers?
You’re not alone! Here are some of the most common queries—and their quick, practical answers—to help you cultivate a thriving harvest.
How long does it take for small red peppers to mature from seed?
Small red peppers typically mature in 60–90 days from transplant, depending on the variety and growing conditions. Pole-trained varieties (like those in this guide) often mature faster—expect vibrant red peppers in 60–75 days if provided with consistent warmth, sunlight, and support. Patience pays off, but don’t hesitate to harvest when they’re still green if you need them sooner!
Can small red peppers grow in hot climates?
Small red peppers are heat-tolerant and thrive in temperatures up to 90°F (32°C). However, extreme heat (above 95°F/35°C) can reduce fruit set. To keep plants productive, provide afternoon shade during peak summer or use drip irrigation to maintain soil moisture. Mulching also helps regulate root temperature—perfect for sunny climates!
What’s the difference between small red peppers and other peppers?
Small red peppers (like Capsicum annuum varieties) are often milder than jalapeños or serranos but pack a sweet, tangy flavor. They’re smaller (1–3 inches long) and typically less spicy (0–5,000 Scoville units), making them ideal for fresh eating, salads, or pickling. For extra heat, look for "red chili" varieties—but small red peppers shine in versatility!
Why aren’t my small red peppers turning red?
Peppers change color when they’re fully ripe, but slow ripening can happen due to cool nights, low light, or nutrient deficiencies. Ensure your plants get 6+ hours of sunlight daily and maintain even moisture. If temps drop below 55°F (13°C), growth slows—consider a row cover or greenhouse extension. Patience is key, but yellow or green peppers can still be harvested!
Can I save seeds from small red peppers for next year?
Yes! To save seeds, let a few peppers fully ripen and dry on the plant, then scoop out the seeds, rinse them, and dry on a paper towel for 3–5 days. Store in a cool, dark place (like a sealed envelope) for up to 2–3 years. Pro tip: Cross-pollination can occur, so grow only one variety if you want true-to-type seeds!
Wrapping up and next steps
Growing small red peppers on a pole isn’t just rewarding—it’s game-changing for space and heat efficiency! 🌶️ With the right setup, you’ll enjoy a bountiful harvest in just 60 days, even in tough climates.
Whether you’re a seasoned gardener or a curious beginner, this method proves that big results come from smart, small steps.
Ready to level up your garden? Start by reviewing your supplies or clearing up any lingering questions. Then, grab those seeds and get planting—your future meals (and bragging rights) are waiting! 🌱