
Container Gardens
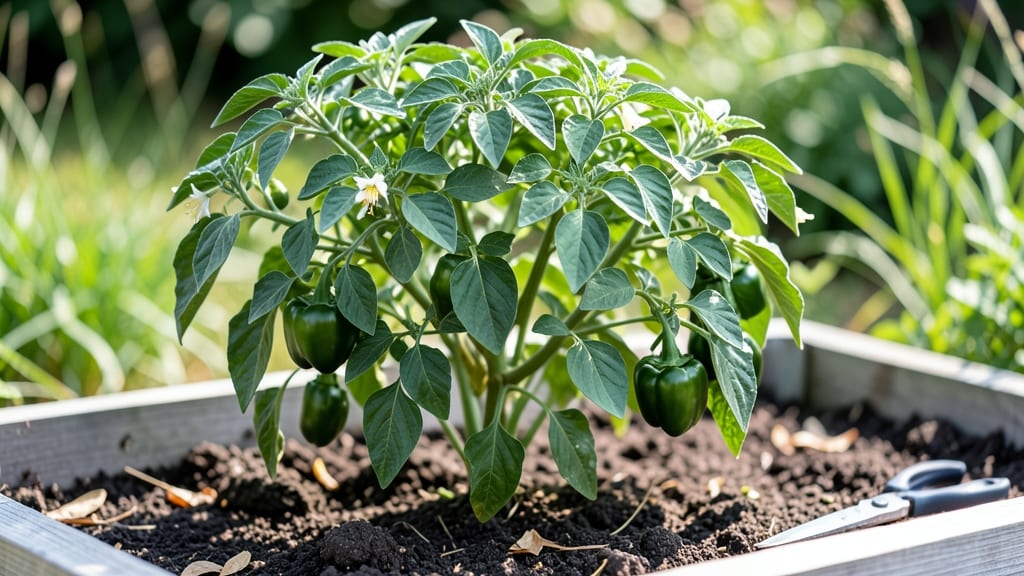
Growing green peppers in pots lets you turn even a tiny balcony into a productive harvest zone—5-6 foot plants on a trellis instead of sprawling vines. 🌱 I learned the hard way that regular pots won’t cut it; you need deep containers (at least 12 inches deep) to prevent root-bound stress.
The right setup means you’ll harvest 20-30 peppers per plant by mid-summer, even in urban spaces. Start with well-draining potting mix and a 5-gallon minimum container per plant—larger is better for heat retention.
Place pots where they’ll get 6+ hours of full sun daily, and water when the top inch feels dry. Overwatering is the #1 killer, so check soil moisture before reaching for the hose.
You’ll notice the first blossoms in 6-8 weeks, followed by peppers that ripen faster than in-ground plants. The pole-training trick saves space while improving air circulation—critical for preventing fungal diseases that plague crowded pots.
This method works for any green pepper variety (jalapeños, banana peppers, even bell peppers) and adapts to patios, rooftops, or sunny windowsills. Here’s how to avoid the common mistakes that sabotage container pepper gardens.
📚 In This Guide
- What you need
- Instructions
- Tips and common mistakes
- Wrapping up and next steps
What you need
- ● Containers: 1–2 5-gallon pots (minimum) with drainage holes (or a large fabric grow bag for flexibility).
- ○ Self-watering pots (optional but great for busy gardeners!).
- ● Potting Mix: 1 bag high-quality, well-draining potting soil (avoid garden soil—it compacts!).
- ○ Perlite or vermiculite (1 part per 4 parts soil, optional for extra aeration).
- ● Fertilizer: Balanced liquid fertilizer (e.g., 10-10-10) or slow-release granules (follow package rates).
- ○ Compost or worm castings (1 cup per pot, optional for organic boost).
- ● Seeds or Seedlings: 4–6 green pepper seeds (or 1–2 transplants if starting late).
- ● Trellis or tomato cage (5–6 ft tall for pole training).
- ● Tools: Hand trowel, pruning shears, and gardening gloves.
- ● Spray bottle (for seedling misting).
- ○ pH test kit (optional but helpful—peppers prefer 6.0–6.8).
- ● Sunlight: 6+ hours of direct sun daily (south-facing spot ideal).
- ○ Temperature: Warmth is key! Peppers thrive in 70–90°F soil temps. Use a heat mat (optional) if starting indoors early.
- ● Water: Consistent moisture (let top inch dry between waterings; avoid soggy soil!).
- ● Space: At least 12–18 inches between plants (or pole-train to save space!).
Step-by-step instructions for growing green peppers in pots
Here's how to coax a productive pepper plant into a container—no sprawling vines or wasted space.
🌱 Step 1: Select and Prepare Your Containers
Choose pots that are at least 12-14 inches deep with drainage holes—peppers hate soggy roots. I use fabric grow bags for my pepper plants because they allow excess moisture to evaporate while still providing the structural support roots need. Fill each pot with 3-4 gallons of high-quality potting mix amended with 10-20% perlite or vermiculite for improved drainage.
Tap the pot gently to settle the soil without compacting it too much. You want the mix to feel like a damp sponge—firm enough to support stems but loose enough for roots to explore. Add a handful of balanced fertilizer (10-10-10) mixed into the top 2 inches of soil to give those hungry roots a kickstart.
🌿 Step 2: Plant Transplants and Set Up Support
Plant your pepper seedlings 1-2 inches deeper than they were in their nursery pots—this encourages stronger root development. Gently firm the soil around the base and water thoroughly until water runs freely from the drainage holes. I always insert a 5-foot bamboo stake or spiral trellis at planting time to avoid disturbing roots later.
Peppers grow best in full sun (6-8 hours daily), so place your pots where they'll get morning light and afternoon sun. If you're growing in partial shade, choose compact varieties like 'Jalapeño M' or 'Shishito'—they tolerate lower light better than sprawling types. Watch for the first true leaves to unfurl; that's your signal the plant has settled in.
✂️ Step 3: Prune and Train for Maximum Yield
When your peppers reach 12-18 inches tall, start pruning side shoots that grow between the main stem and branches. Use clean pruners to snip these suckers just above a leaf node—this redirects energy to fruit production. I also pinch off the first few flowers that appear; letting the plant focus on foliage first results in stronger stems and bigger yields later.
Weave the main stem around your trellis or stake every 6-8 inches as it grows. This prevents the heavy pepper clusters from toppling the plant. You'll know your training is working when the stem stays upright even under the weight of a half-dozen peppers. Water at the base deeply every 2-3 days during fruiting, keeping the soil evenly moist but never soggy.
💧 Step 4: Fertilize and Monitor for Pests
Feed your pepper plants every 3-4 weeks with a balanced liquid fertilizer (like fish emulsion) diluted to half-strength. Look for signs of nutrient deficiency—yellowing leaves often mean nitrogen deficiency, while purple stems signal phosphorus needs. I also sprinkle compost tea around the base monthly to boost microbial activity in the soil.
Check the undersides of leaves weekly for early signs of pests. Spider mites love pepper plants, so I mist the foliage with water every few days to keep humidity high enough to deter them. If you spot aphids, blast them off with a strong stream of water—peppers are tough enough to handle the rough treatment. Harvest peppers when they reach 3-4 inches long for best flavor, and always twist gently to avoid damaging the plant.
⏰ Step 5: Extend the Season and Prepare for Winter
As temperatures drop below 50°F at night, move your pepper pots to a sheltered location or under a cold frame. I wrap the pots in bubble wrap to protect roots from freezing, leaving the top exposed for light. Peppers go dormant in cold weather, so reduce watering to once every 7-10 days and stop fertilizing entirely until spring.
In late winter, trim back any dead growth and repot if roots are circling the container. Pepper plants are perennials in warm climates, so with proper winter care, you can get multiple harvests from the same plant. I always save my healthiest pepper plants to propagate through cuttings in early spring—this gives me a head start on the growing season.
Tips & tricks for perfect pole-trained green peppers in pots
These battle-tested strategies will help you maximize your container-grown pepper harvest without the usual headaches.
Container Depth Matters: Never skimp on pot size—those 12-14 inches of depth are non-negotiable for healthy root systems. I've seen peppers in shallower containers struggle with stunted growth and poor fruiting. If you're using decorative pots without drainage, add a cache pot with pebbles underneath to prevent root rot. The extra inch or two makes all the difference when your plant is supporting multiple pepper clusters.
Sunlight Strategy: Those 6-8 hours of daily sun absolutely must include afternoon sunlight—morning sun alone won't cut it. If your balcony only gets morning light, consider reflective surfaces like white walls or mirrors to bounce extra light onto your plants. I've had great success with south-facing windowsills where the plants get direct sun from 10am-4pm. Watch for leaves turning pale yellow—the classic sign of insufficient light.
Pruning Precision: When you're pruning those side shoots at 12-18 inches, aim for clean cuts just above a leaf node where new growth will emerge. I use sharp pruners and sterilize them with rubbing alcohol between cuts to prevent disease transmission. The key is removing only the suckers that grow between main stems and branches—never cut into the main stem itself. This technique redirects energy to fruit production while maintaining plant structure.
Winter Survival Hack: That 50°F threshold is critical—peppers will start showing stress below this temperature. I've found that moving pots to an unheated garage with south-facing windows can extend the season by several weeks. The bubble wrap trick works wonders, but leave the top exposed to prevent condensation buildup. Remember to reduce watering dramatically—dormant plants need far less moisture than actively growing ones.
Pro Tips for Growing Green Peppers In Pots
- These battle-tested strategies will help you maximize your container-grown pepper harvest without the usual headaches.
- Container Depth Matters: Never skimp on pot size—those 12-14 inches of depth are non-negotiable for healthy root syst...
- Sunlight Strategy: Those 6-8 hours of daily sun absolutely must include afternoon sunlight—morning sun alone won't cu...
Frequently asked questions
Got questions about growing green peppers in pots? You're not alone! Here are answers to the most common queries to help you cultivate a thriving harvest in small spaces.
What’s the best pot size for growing green peppers?
For healthy green peppers, opt for pots that are at least 12–18 inches deep and wide. Larger pots (20+ inches) give roots more room to spread, especially for pole-trained varieties. Ensure pots have drainage holes to prevent soggy soil—root rot is a common enemy!
How long does it take for green peppers to grow in pots?
From seed, expect 60–90 days to harvest, depending on the variety. Transplants may fruit sooner (45–60 days). Pole-trained peppers can produce all season if pruned and supported properly. Patience pays off—consistent warmth and sunlight speed up the process!
Can I grow green peppers in pots without trellising?
Yes, but expect smaller yields and bushier plants. Bush varieties (like ‘California Wonder’) thrive in pots without support, but they’ll need more frequent harvesting to encourage new fruit. For pole-trained peppers, trellises save space and improve airflow—reducing disease risk.
What pests should I watch for when growing peppers in pots?
Common culprits include aphids, spider mites, and hornworms. Inspect leaves regularly for holes or sticky residue. Use neem oil or insecticidal soap for mild infestations. Prevention tip: Keep pots in sunny, breezy spots to deter pests naturally.
Do green peppers need full sun in pots?
Peppers crave 6–8+ hours of direct sunlight daily. In pots, they’re more vulnerable to heat stress, so morning sun with afternoon shade works in hot climates. If sunlight is limited, supplement with a grow light (12–14 hours/day) to keep plants happy.
Wrapping up and next steps
Growing green peppers in pots isn’t just possible—it’s a rewarding way to enjoy fresh, homegrown veggies even in small spaces! With the right containers, sunlight, and care, you’ll harvest vibrant peppers all season long.
Start small, experiment with varieties, and soon you’ll be sharing your pole-trained bounty with friends and family.
Ready to dive in? Pick your pots, plant your seeds, and let the green pepper adventure begin! 🌱✨