
Container Gardens
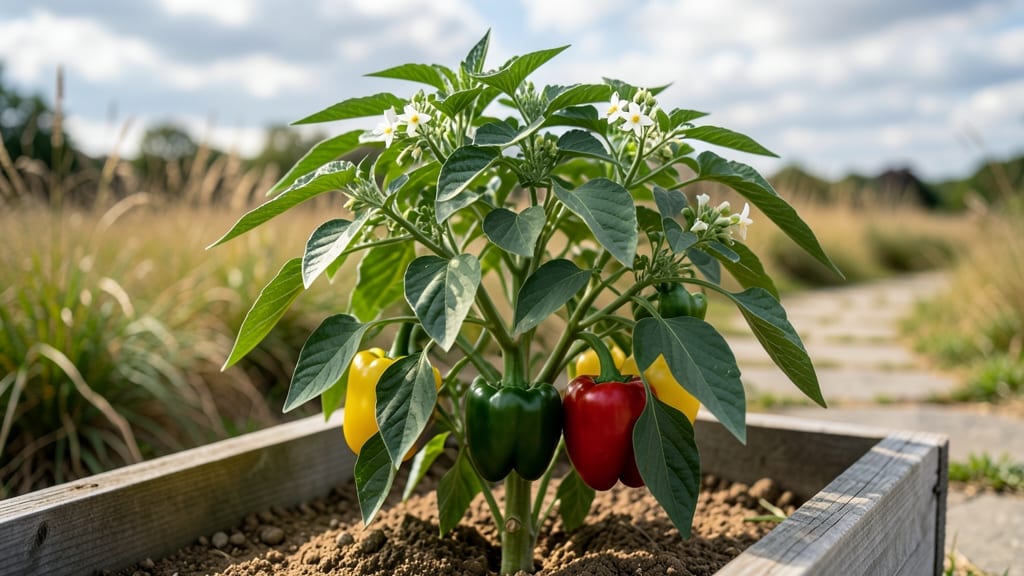
Growing peppers in pots unlocks a world of flavor right on your balcony or patio—no yard required. 🌱 I’ve turned my tiny urban space into a pepper powerhouse by choosing compact varieties and the right containers, and the results are worth every inch of effort.
These plants thrive in pots when you match them to their needs, and the mobility means you can chase the sun or protect them from unexpected rain.
The secret to success starts with the right pots—at least 5 gallons for each pepper plant—and well-draining soil mixed with compost. Smaller varieties like ‘Shishito’ or ‘Jalapeño’ do beautifully in containers, while larger types need deeper pots or pruning to stay manageable.
Overwatering is the biggest pitfall, so I check soil moisture with my finger before watering deeply but infrequently.
With the right setup, you’ll harvest peppers all season long—sweet, spicy, or somewhere in between—without sacrificing space. The plants stay healthy, productive, and even easier to protect from pests.
Plus, you can move them to optimize sunlight or bring them indoors before frost. This is gardening that actually fits your life.
Whether you’re working with a rooftop, windowsill, or fire escape, container peppers prove that space isn’t the limit—just the starting point. Here’s how to set it up for maximum success, from soil to sunlight and everything in between.
📚 In This Guide
- What you need
- Instructions
- Tips and common mistakes
- Wrapping up and next steps
What you need
- ● Containers: 5-gallon pots (or larger) with drainage holes—3-5 pots depending on the number of pepper varieties you want to grow.
- ● Potting Mix: High-quality, well-draining container mix (avoid garden soil—it compacts!). 1 bag (40-50 lbs) should suffice for 3-5 pots.
- ● Peppers: Seedlings or seeds of your favorite varieties (e.g., jalapeños, bell peppers, or habaneros). 1-2 plants per pot for optimal growth.
- ● Fertilizer: Balanced, water-soluble fertilizer (e.g., 10-10-10 or 5-5-5) or slow-release granules. Follow label instructions for dosage.
- ● Drainage Material: Small rocks, gravel, or broken pottery pieces (1-2 inches per pot) to improve drainage.
- ● Gloves (to protect your hands from soil and thorns).
- ● Trowel or small shovel for planting and mixing soil.
- ● Watering can or hose with a gentle spray nozzle (peppers hate soggy roots!).
- ○ Spray bottle (optional, for misting seedlings).
- ○ Stakes or cages (optional, for tall varieties like bell peppers).
- ○ Mulch (optional, to retain moisture and regulate soil temp—use straw or shredded leaves).
- ● A sunny spot! Peppers need 6-8 hours of direct sunlight daily—balconies, patios, or south-facing windowsills work great.
- ● Patience! Peppers take 60-90 days to mature from seed, so start early or buy seedlings.
- ● Consistency—peppers thrive on regular watering (keep soil moist but not waterlogged).
Step-by-step guide to growing peppers vertically in pots
Here’s how to turn limited space into a thriving pepper garden with minimal fuss.
🪴 Step 1: Choose the Right Containers and Drainage
Peppers need room to grow, so opt for pots at least 12 inches deep and 12 inches wide for each plant—this mimics their natural root spread. I use fabric grow bags for my vertical setup because they’re lightweight, breathable, and prevent root-bound stress. If you’re stacking pots vertically, ensure each has sturdy handles or a built-in trellis system.
Drainage is non-negotiable. Poke extra holes in the bottom of any container without them, then place a 1-inch layer of gravel or broken pottery shards at the base. This keeps roots from sitting in water while allowing excess moisture to escape. I always test drainage by filling the pot halfway with water—if it drains within 5 minutes, you’re good to go.
🌱 Step 2: Fill Pots with Lightweight, Fertile Soil
Peppers hate soggy roots, so fill your pots with a mix of 50% potting soil and 50% perlite or coco coir to improve aeration. I like to add a handful of worm castings to the bottom of each pot for a gentle nutrient boost—this helps peppers establish strong roots before fruiting. Fill the pot to 1 inch below the rim, leaving room for watering.
Press the soil down lightly with your fingers until it’s firm but not compacted. You’ll know it’s right when a gentle squeeze leaves the soil holding its shape without crumbling. Avoid garden soil—it’s too dense and can harbor diseases that weaken pepper plants. If your mix feels too heavy, stir in an extra 10% perlite to keep it fluffy.
☀️ Step 3: Plant Peppers and Provide Support Early
Dig a hole in the center of each pot, just deep enough to bury the pepper plant up to its first set of leaves. Gently tease out the roots if they’re circling the root ball—this encourages them to spread into the new soil. Place a small bamboo stake or tomato cage in the hole before setting the plant in, so you don’t disturb the roots later.
Peppers grow tall and top-heavy, so I tie the main stem to the stake with soft plant ties as soon as it reaches 6 inches. This prevents snapping when fruit sets. If you’re stacking pots vertically, choose compact varieties like ‘Shishito’ or ‘Jalapeño’—they handle confinement better than sprawling types like bell peppers. Water deeply after planting to settle the soil around the roots.
💧 Step 4: Water and Fertilize for Consistent Production
Peppers despise wet feet, so water only when the top 1-2 inches of soil feel dry. I use a moisture meter to check—if it reads dry at 1 inch down, it’s time to water. Pour water slowly until it drains from the bottom, then empty the saucer to prevent root rot. In hot weather, you might need to water daily, but always let excess moisture escape.
Feed peppers every 2-3 weeks with a balanced liquid fertilizer (like 10-10-10) diluted to half strength. I switch to a low-nitrogen, high-phosphorus formula once flowers appear to encourage fruiting. Yellowing leaves? You’re overwatering. Drooping in the heat? It’s thirsty. Peppers are forgiving but need consistency—never let them dry out completely or sit in soggy soil.
✂️ Step 5: Prune and Harvest for Continuous Yield
Pinch off the first few flowers that appear on young plants to redirect energy into stem growth. Once the plant is established, let it flower freely—peppers produce best when slightly stressed. Prune suckers (the shoots that grow where the stem meets a branch) to keep the plant focused on fruit production. I also remove any leaves touching the soil to prevent disease.
Harvest peppers as soon as they ripen to encourage more production. Green peppers can stay on the plant for weeks, but hot varieties like ‘Cayenne’ turn red quickly—pick them when fully colored for maximum heat. Use pruning shears to cut stems cleanly, leaving a small nub. I harvest every 3-4 days in peak season to keep plants productive. Store peppers in a cool, dark place or freeze them for later use.
Tips & tricks for perfect peppers in pots
Here's what nobody tells you about keeping your pepper plants thriving in containers.
Container Selection: If you're stacking pots vertically, choose ones with built-in handles or sturdy sides—nothing worse than a wobbly pot toppling over when you're checking on your plants. I've had great success with fabric grow bags stacked on a wall-mounted trellis system, which gives me easy access to all sides of the plants. For weight distribution, place the heaviest pots at the bottom of your stack, especially if you're using terracotta which can get heavy when wet.
Soil Mix Upgrade: That 50/50 potting soil and perlite mix is a great base, but I like to add a handful of composted leaf mold to the bottom of each pot before filling with the mix. This extra organic matter helps retain moisture while still providing excellent drainage. Another trick: mix in a slow-release fertilizer like Osmocote when you fill the pots—this gives your peppers a steady nutrient supply right from the start, cutting down on how often you need to fertilize later.
Drainage Test: That 5-minute drainage test is crucial—if your pot doesn't drain properly, you'll end up with root rot before you know it. I've learned this the hard way after losing two pepper plants to soggy roots. Pro tip: if you're using decorative pots without drainage holes, place them in saucers filled with gravel, then add water to the saucer rather than pouring directly into the pot. This gives you the aesthetic you want while still allowing excess water to escape.
Harvest Frequency: Those 3-4 days between harvests in peak season might seem like a lot, but it's actually perfect for keeping your plants productive. I've found that harvesting when peppers are fully colored (not waiting until they're overripe) encourages the plant to produce more flowers and fruit. For hot varieties like Cayenne, I check them every other day once they start turning color—they ripen quickly and lose heat if left too long on the plant.
Pro Tips for Peppers In Pots
- Here's what nobody tells you about keeping your pepper plants thriving in containers.
- Container Selection: If you're stacking pots vertically, choose ones with built-in handles or sturdy sides—nothing worse than a wobbly pot toppling over when you're checking on your plants.
- Soil Mix Upgrade: That 50/50 potting soil and perlite mix is a great base, but I like to add a handful of composted leaf mold to the bottom of each pot before filling with the mix.
Frequently asked questions
Got questions about growing peppers in pots? You’re not alone! Here are answers to the most common queries to help you cultivate a thriving vertical pepper garden—no green thumb required.
What’s the best container size for growing peppers in pots?
Peppers need at least 12–18 inches of depth and a 5–7 gallon pot per plant for optimal growth. Smaller pots (like 1-gallon) work for dwarf varieties (e.g., ‘Shishito’ or ‘Pepperoncini’), but larger pots prevent root-binding and boost yields. Pro tip: Add drainage holes and use lightweight potting mix to avoid overwatering!
When is the best time to plant peppers in pots?
Peppers love warm soil (60°F+), so wait until after the last frost (typically late spring/early summer). Start seeds indoors 8–10 weeks before transplanting or buy sturdy seedlings from a nursery. Hot tip: Use a heat mat if your space is chilly—peppers are not frost-tolerant!
Can I grow multiple pepper varieties in the same pot?
While possible, avoid mixing varieties unless they have similar growth habits and maturity times. Overcrowding stresses plants, reducing fruit quality. Instead, dedicate one pot per plant or group compatible companions like basil or marigolds (which deter pests). Space saver: Try vertical trellises for vining peppers (e.g., ‘Cayenne’)!
Why are my pepper leaves turning yellow in pots?
Yellowing leaves often signal overwatering, underwatering, or nutrient deficiencies. Check soil moisture—peppers hate soggy roots! Fix it: Water when the top inch is dry, use well-draining soil, and fertilize every 2–3 weeks with a balanced (10-10-10) or tomato/vegetable feed. Quick check: Wilting + crispy edges = thirsty plant; mushy stems = root rot!
What are good pepper alternatives for tiny spaces?
Short on space? Try these low-maintenance, high-yield alternatives:
- Shishito peppers – Compact, prolific, and great for stir-fries.
- Pepperoncini – Bushy, heat-tolerant, and perfect for pickling.
- Mini bell peppers – Sweeter and smaller than standard bells.
- Thai bird’s eye chilies – Tiny but fiery; thrive in 1-gallon pots.
Wrapping up and next steps
Growing peppers in pots is a rewarding way to bring bold flavors and vibrant colors to your small space—no yard required! 🌱 With the right containers, soil, and care, you can enjoy a thriving vertical garden that’s both practical and beautiful.
Whether you’re a beginner or a seasoned gardener, this method proves that big harvests come in small packages.
Ready to take the next step? Start with just one pepper plant in a sunny spot, and let your confidence (and green thumb!) grow. Before you know it, you’ll be swapping store-bought peppers for your homegrown bounty—one pot at a time! 🌶️✨